• Skip to main content
  • Skip to primary sidebar
The Little Ferraro Kitchen logo
menu icon
go to homepage
  • Comforting Fall Recipes
  • Recipe Index
  • Cookbooks
  • About
  • Contact
search icon
Homepage link
  • Comforting Fall Recipes
  • Recipe Index
  • Cookbooks
  • About
  • Contact
×
Home » Recipes

Blog

I graduated College!

May 28, 2013 · 12 Comments

Pheww....I can finally take a breath from all the fun festivities the last few weeks.

Last Wednesday, May 22 2013, I can officially say that I am now a college graduate!

This was such a huge moment in my life and I really want to share it with everyone!

My degree is Bachelor of Science in Community Health Education. It is similar to Public Health and I am so thrilled to be able to educate the community on health, prevention and healthy lifestyle changes. My dream would be to combine my love for cooking and blogging with health education.

A few highlights of my graduation.....

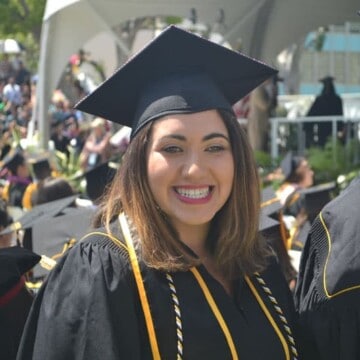
Yes, that is me, with the HUGE smile!

My amazing parents flew in from Hawaii! The only thing I asked my mom was to have a lei! She made the gold and black silk leis and flew in plumeria and orchid leis!

My amazing friends flew in from the East Coast too! I felt so loved!

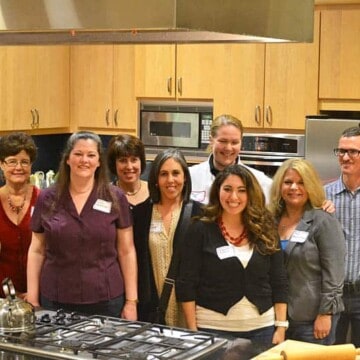
Some of my college friends!

We did it!!

Of course we had to have the grad party!

My mom and I made these centerpieces! So easy, just daisies and limes and mini peppers! I love the orange and pink together!

The "bar" was a huge hit! I need to blog about these amazing mango margarita's that Joe was whipping up!

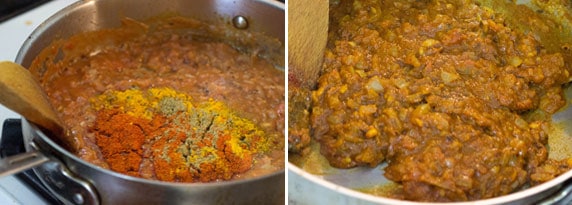
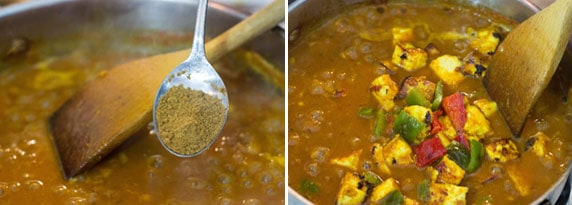
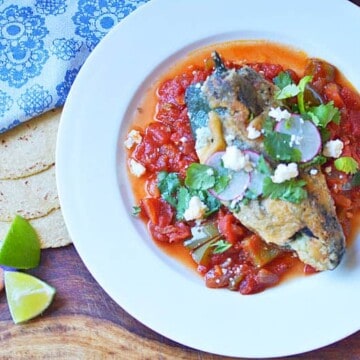
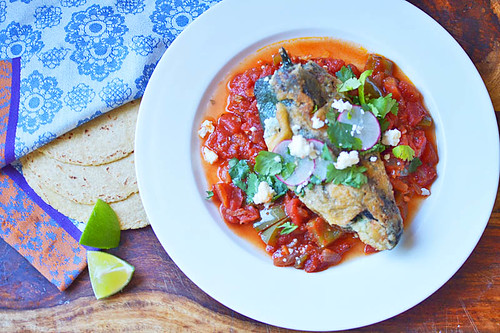
For the food, we catered a taco cart! Everyone loved them..who doesn't love tacos?

My amazing husband!

Thank you for sharing this special time with me!

POG Daiquiri [Guest Post}

May 22, 2013 · 4 Comments

Passio orange a guava is a classic Hawaiian drink and this POG cocktail has dark rum for an added kick.

Today is my graduation day! And I couldn't have asked a more perfect person than my fav wahine, Shanna from Pineapple and Coconut to guest post for me today! As you will see, we have a special "Aloha" bond and of course she made the most perfect cocktail for today's festivities!

You can follow Shanna's delicious treats on her blog, Facebook and Twitter!

--

Hi this is Shanna and I am the owner and operator over at the blog, Pineapple  and Coconut. It’s funny that I am doing this guest post for Sam because a few weeks ago I had asked her to do a guest post for me as I was about to have a crazy busy month with finishing up (well almost finishing ) our kitchen remodel and moving into the house, I knew I wouldn’t have as much time to blog so I needed some help from other blogger friends to fill in some gaps. Sam also has had a very busy month with her graduation and wasn’t  going to have much time for  her blog as well and she asked me to guest post pretty much the same day I asked her. She made an awesome, classic Hawaiian dish, the Loco Moco, for my blog and  I wanted to create a fun, Hawaiian drink to celebrate her graduation. So I created this Pog Daiquiri for her.

Hawaii is home away from home. It is my absolute favorite place on earth and every time I meet someone with a connection to Hawaii such as Sam, we almost always hit it off right away. Gotta love that Aloha spirit.

My family went to Hawaii ALL the time when I was growing up; my dad was an airline pilot and was actually based there when I was really little, and I remember having breakfasts at our hotels on Waikiki beach and my favorite treat to get, besides macadamia nut pancakes, was POG.

POG is a combination of passion fruit , orange and guava juices. I also love just guava juice, but there is just something so good about POG that every time I have it now it takes me back to having breakfast at the Beachcomber, Royal Hawaiian or Outrigger hotel when I was a kid. Except now as an adult – I add booze,which makes it THAT much better.

Sam and I also share a love of passion fruit, known as Lilikoi in Hawaiian. Her mom still lives in Hawaii and has Lilikoi trees in her yard. I wish they would grow here!! So when I was at the Hawaiian Lei Days festival here in Vegas at the beginning of May I spotted a vendor that sells these amazing salts and spices with different island flavors and I spotted Lilikoi Cane Sugar and I knew I wanted to use that for rimming the glasses of these drinks. It was a perfect addition to this POG Daiquiri.

I tried these drinks with regular Bacardi silver rum and with Bacardi coconut. I didn’t want to take away too much from the flavor of the POG since it’s not very strong, and I wasn’t sure if the coconut would be too overpowering, but it wasn’t. It really enhanced the flavor of the juice. Plus a little float of dark rum on top and a tropical umbrella straw transports you right to a beach on Hawaii. For a few moments at least. I also tried these on the rocks and blended, and I think a fruity tropical umbrella drink has to be blended.

So raise a glass of this POG Daiquiri in congrats to Sam on her college graduation!! Thank you for having me guest post for you!!

Print Recipe
5 from 5 votes

POG Daquiri [Guest Post}

Passio orange a guava is a classic Hawaiian drink and this POG cocktail has dark rum for an added kick.
Prep Time10 minutes mins
Total Time10 minutes mins
Course: Drinks
Cuisine: Hawaiian
Servings: 2 cocktails
Calories: 177kcal
Author: Samantha Ferraro

Ingredients

  • 1 can 15 ounces of Hawaiian Sun Pass-O-Guava nectar
  • ½ cup Bacardi coconut rum 4-6 ounces, Or Bacardi Silver
  • 2 cups ice
  • 2 tablespoon Dark rum Bacardi or Meyers, divided
  • Simple syrup even 1:1 water/sugar ratio heated until sugar is dissolved then cooled
  • Sugar for rimming glasses use a finer granule sugar or flavored sugar such as the Lilikoi Cane Sugar from www.saltywahine.com
US Customary - Metric

Instructions

  • Take two cocktail glasses and dip the rims in simple syrup and then coat in sugar.
  • In a blender combine the juice, ½ c (4 ounces) rum and ice and blend well.Taste and add more rum if desired. Divide between the glasses and top each drink with 1 tablespoon of the dark rum. Add a fancy tropical straw and enjoy!!
  • Notes: The juice can be found at Whole Foods. There is also a brand of juices called Ceres, that makes guava and passion fruit blends. If you can’t find the Hawaiian Sun nectar, you can combine the passion fruit and guava juice in equal parts with orange juice to make your own POG nectar. So 5 ounces of each to make up for a can of the nectar.

Nutrition

Calories: 177kcal | Carbohydrates: 1g | Sodium: 15mg | Potassium: 2mg | Sugar: 1g | Calcium: 7mg | Iron: 0.03mg


Roasted Vegetable Bruschetta and Giveaway

May 6, 2013 · 6 Comments

A simple and colorful appetizer, this roasted vegetable bruschetta has roasted zucchini that is flavored with herbes de provence and layered with tangy goat cheese.

Roasted Vegetable Bruschetta via LittleFerraroKitchen.com

A roasted vegetable bruschetta with zucchini is as simple and delicious as it gets. I was going to add roasted cherry tomatoes as well, but I thought the yellow and green was just so pretty.

I sprinkled herbes de provence over the vegetables and whipped up a combination of cream cheese and goat cheese laced with lemon zest.

This is such an easy appetizer and perfect for using all the gorgeous seasonal produce that is starting to bloom.

Print Recipe
5 from 1 vote

Roasted Vegetable Bruschetta and Giveaway

Inspired by the Oldways Cookbook
Author: Samantha Ferraro

Ingredients

  • 1 yellow squash cut in small cubes
  • 1 yellow bell pepper cut in small cubes
  • 1 zucchini cut in small cubes
  • 1 teaspoon Herbes de Provence
  • ½ c cream cheese
  • 3 oz goat cheese
  • 1 teaspoon lemon zest
  • 1 garlic clove chopped
  • Few leaves of fresh basil chopped
  • Crusty bread sliced and toasted
  • Salt and pepper to taste
  • Olive oil for drizzling

Instructions

  • Place all vegetables on a foil lined baking sheet and add herbes de provence, garlic, salt, pepper and drizzle with olive oil. Toss together so everything is coated and roast in 350 degree oven for 20 minute or until vegetables begin to caramelize.
  • To make the cheese spread, use an electronic mixer to whip the cream cheese, goat cheese and lemon zest. Mix for a minute until everything is incorporated.
  • When everything is done, spread the whipped cheese mixture on the crusty bread, top with roasted vegetables and sprinkle fresh basil on top.

Print Recipe
5 from 7 votes

Roasted Vegetable Bruschetta

A simple and colorful appetizer, this roasted vegetable bruschetta has roasted zucchini that is flavored with herbes de provence and layered with tangy goat cheese.
Servings: 4 servings
Calories: 347kcal
Author: Samantha Ferraro

Ingredients

  • 1 yellow squash cut in small cubes
  • 1 yellow bell pepper cut in small cubes
  • 1 zucchini cut in small cubes
  • 1 teaspoon Herbes de Provence
  • ½ c cream cheese
  • 3 oz goat cheese
  • 1 teaspoon lemon zest
  • 1 garlic clove chopped
  • Few leaves of fresh basil chopped
  • 8 crostini
  • Salt and pepper to taste
  • Olive oil for drizzling
US Customary - Metric

Instructions

  • Place all vegetables on a foil lined baking sheet and add herbes de provence, garlic, salt, pepper and drizzle with olive oil. Toss together so everything is coated and roast in 350 degree oven for 20 minute or until vegetables begin to caramelize.
  • To make the cheese spread, use an electronic mixer to whip the cream cheese, goat cheese and lemon zest. Mix for a minute until everything is incorporated.
  • When everything is done, spread the whipped cheese mixture on the crusty bread, top with roasted vegetables and sprinkle fresh basil on top.

Nutrition

Calories: 347kcal | Carbohydrates: 38g | Protein: 13g | Fat: 16g | Saturated Fat: 9g | Polyunsaturated Fat: 1g | Monounsaturated Fat: 4g | Cholesterol: 38mg | Sodium: 569mg | Potassium: 448mg | Fiber: 3g | Sugar: 7g | Vitamin A: 866IU | Vitamin C: 73mg | Calcium: 150mg | Iron: 3mg

Tandoori-Style Chicken Burgers

Apr 29, 2013 · 5 Comments

A bold and flavorful spin on the traditional burger, these Tandoori chicken burgers are seasoned with garam masala and warm curry.

Tandoori-Style Chicken Burgers via LittleFerraroKitchen.com

These tandoori chicken burgers are super easy. All you do is add amazing spices and whip up a simple yogurt sauce, which I make all the time.

Large pita bread instead of burger buns and top with fresh tomato.

This is my kinda summer-grillin'!

Ingredients

  • Ground Chicken
  • Green Onions
  • Ginger
  • Garlic 
  • Lemon 
  • Cumin
  • Cayenne
  • Garam Masala
  • Curry Powder
  • Turmeric
  • Garlic Powder
  • Salt and Pepper 
  • Yogurt
  • Fresh Mint 
  • Naan
  • Tomato

Instructions

  1. In a large bowl, mix together the ground chicken, all the spices, garlic, lemon juice, ginger and green onions. Use your hands to score into 4 patties and and form into burgers.
  2. Heat a skillet or grill (I drizzle oil on the skillet) and cook burgers on each side until cooked through, about 3-4 min each side.
  3. To make the yogurt sauce, mix all ingredients together in a bowl. (Sometimes I had finely chopped cucumber as well).
  4. To assemble the burgers: Place burger on pita bread and top with tomato slice, fresh mint pr cilantro or parsley and dollop of yogurt sauce.
Tandoor Style Chicken Burgers
Print Recipe
5 from 7 votes

Tandoori-Style Chicken Burgers

A bold and flavorful spin on the traditional burger, these Tandoori chicken burgers are seasoned with garam masala and warm curry.
Prep Time15 minutes mins
Cook Time10 minutes mins
Total Time25 minutes mins
Course: Main
Cuisine: American, Indian
Keyword: tandoori chicken burger
Servings: 4 burgers
Calories: 581kcal
Author: Samantha Ferraro

Ingredients

Chicken Mixture

  • 1 lb ground chicken
  • 2 green onions chopped
  • 1 in piece of ginger peeled and grated
  • 1 garlic clove chopped
  • ½ lemon juiced
  • 3 teaspoon cumin
  • ½ teaspoon cayenne
  • ½ teaspoon gram masala
  • 2 teaspoon curry powder
  • 1 teaspoon turmeric
  • 1 teaspoon garlic powder
  • Salt and pepper to taste

Yogurt Sauce

  • ½ c Greek yogurt
  • Small bunch fresh mint chopped
  • 1 teaspoon cumin
  • ½ lemon juiced

Additions

  • 4 naan
  • 1 tomato sliced
US Customary - Metric

Instructions

  • In a large bowl, mix together the ground chicken, all the spices, garlic, lemon juice, ginger and green onions. Use your hands to score into 4 patties and and form into burgers.
  • Heat a skillet or grill (I drizzle oil on the skillet) and cook burgers on each side until cooked through, about 3-4 min each side.
  • To make the yogurt sauce, mix all ingredients together in a bowl. (Sometimes I had finely chopped cucumber as well).
  • To assemble the burgers: Place burger on pita bread and top with tomato slice, fresh mint pr cilantro or parsley and dollop of yogurt sauce.

Notes

Inspired by Baked Bree

Nutrition

Calories: 581kcal | Carbohydrates: 66g | Protein: 33g | Fat: 20g | Saturated Fat: 5g | Polyunsaturated Fat: 2g | Monounsaturated Fat: 4g | Trans Fat: 0.1g | Cholesterol: 109mg | Sodium: 933mg | Potassium: 772mg | Fiber: 4g | Sugar: 6g | Vitamin A: 210IU | Vitamin C: 16mg | Calcium: 152mg | Iron: 3mg

Burnt Orange Ice Cream

Apr 21, 2013 · 2 Comments

Burnt orange ice cream is loaded with layered flavors of caramel and deep citrus. This is not your every day orange ice cream.

Burnt orange ice cream is a gorgeous caramel with butter and sugar (well obviously) with fresh orange juice, orange zest and of course cream and eggs! Making the caramel was a magic experience.

It turned dark golden-orange and infused the cream mixture with a deep, rich flavor. Ladies and gentleman, this is not your momma's orange ice cream.

Method:

1) In a medium saucepan combine the cream, milk and orange zest and bring to a  light boil. Remove the pan from heat, cover, and let stand while you make the other mixture.

2) In another saucepan, combine ½ cup sugar and orange juice and bring to a boil over medium high heat, stirring with a whisk until sugar is dissolved. Bring to a boil without stirring, but swirling the pan every so often. Do this until the the mixture turns into a deep caramel color.

3) Remove the caramel from heat and carefully add the warmed cream mixture together, while whisking until smooth. Put back on low heat, while whisking for a few more minutes.

4) In a separate bowl, whisk together the egg yolks, ¼c sugar and salt. Slowly had about ½ cup of the warm cream mixture to the eggs while whisking. You want to do this slowly to "temper" the eggs so they don't scramble and everything incorporates well. So this until everything is mixed together.

5) Bring mixture back into the saucepan and cook on low heat while stirring with a wooden spoon. The custard will thicken and you want to be able to coat the back of the spoon.

6) When ready, pour mixture through a fine sieve and into a clean bowl. Stir in vanilla and allow to cool to room temperature. Then place in refrigerator for at least 2 hours until cold.

7) When custard is cool enough, pour into your ice cream maker (I used my Kitchen-Aid attachment). Leave it on setting 1-2 for 20 minutes. At this point it was way too soft and I placed it in an airtight container and allowed it to freeze for a few more hours. The ice cream is silky and soft enough to scoop out easily.

Ingredients

  • Heavy Cream
  • Milk
  • Oranges
  • Sugar
  • Orange Juice
  • Egg
  • Salt
  • Vanilla Extract

Instructions

  1. In a medium saucepan combine the cream, milk and orange zest and bring to a light boil. Remove the pan from heat, cover, and let stand while you make the other mixture.
  2. In another saucepan, combine ½ cup sugar and orange juice and bring to a boil over medium high heat, stirring with a whisk until sugar is dissolved. Bring to a boil without stirring, but swirling the pan every so often. Do this until the the mixture turns into a deep caramel color.
  3. Remove the caramel from heat and carefully add the warmed cream mixture together, while whisking until smooth. Put back on low heat, while whisking for a few more minutes.
  4. In a separate bowl, whisk together the egg yolks, ¼ cup sugar and salt. Slowly had about ½ cup of the warm cream mixture to the eggs while whisking. You want to do this slowly to "temper" the eggs so they don't scramble and everything incorporates well. So this until everything is mixed together.
  5. Bring mixture back into the saucepan and cook on low heat while stirring with a wooden spoon. The custard will thicken and you want to be able to coat the back of the spoon.
  6. When ready, pour mixture through a fine sieve and into a clean bowl. Stir in vanilla and allow to cool to room temperature. Then place in refrigerator for at least 2 hours until cold.
  7. When custard is cool enough, pour into your ice cream maker (I used my Kitchen-Aid attachment). Leave it on setting 1-2 for 20 minutes. At this point it was way too soft and I placed it in an airtight container and allowed it to freeze for a few more hours. The ice cream is silky and soft enough to scoop out easily.

More interesting desserts

  • Caramel eclairs with caramel sauce on top.
    Salted Caramel Eclairs
  • Burnt Basque Cheesecake inspired from the infamous La Viña in San Sebastian, Spain. Incredibly light and creamy with a deep caramel burnt top
    San Sebastian Cheesecake
  • Fruit Rose Tart with Rose Whipped Cream
  • Sticky Cinnamon Bun Rugelach
Print Recipe
5 from 4 votes

Burnt Orange Ice Cream

Burnt orange ice cream is loaded with layered flavors of caramel and deep citrus. This is not your every day orange ice cream.
Prep Time10 minutes mins
Cook Time30 minutes mins
Chilling3 hours hrs
Total Time3 hours hrs 40 minutes mins
Course: Dessert
Cuisine: American
Keyword: orange ice cream
Servings: 8 servings
Calories: 297kcal
Author: Samantha Ferraro

Ingredients

  • 1 ½ c heavy cream
  • 1 ½ c whole milk
  • 2 Tb finely grated orange zest from 3 large oranges
  • ¾ c sugar divided
  • ½ c strained fresh orange juice about 2-3 large oranges
  • 5 egg yolks
  • ¼ teaspoon salt
  • ½ teaspoon vanilla extract
US Customary - Metric

Instructions

  • In a medium saucepan combine the cream, milk and orange zest and bring to a light boil. Remove the pan from heat, cover, and let stand while you make the other mixture.
  • In another saucepan, combine ½ cup sugar and orange juice and bring to a boil over medium high heat, stirring with a whisk until sugar is dissolved. Bring to a boil without stirring, but swirling the pan every so often. Do this until the the mixture turns into a deep caramel color.
  • Remove the caramel from heat and carefully add the warmed cream mixture together, while whisking until smooth. Put back on low heat, while whisking for a few more minutes.
  • In a separate bowl, whisk together the egg yolks, ¼ cup sugar and salt. Slowly heat about ½ cup of the warm cream mixture to the eggs while whisking. You want to do this slowly to "temper" the eggs so they don't scramble and everything incorporates well. So this until everything is mixed together.
  • Bring mixture back into the saucepan and cook on low heat while stirring with a wooden spoon. The custard will thicken and you want to be able to coat the back of the spoon.
  • When ready, pour mixture through a fine sieve and into a clean bowl. Stir in vanilla and allow to cool to room temperature. Then place in refrigerator for at least 2 hours until cold.
  • When custard is cool enough, pour into your ice cream maker (I used my Kitchen-Aid attachment). Leave it on setting 1-2 for 20 minutes. At this point it was way too soft and I placed it in an airtight container and allowed it to freeze for a few more hours. The ice cream is silky and soft enough to scoop out easily.

Notes

Burnt Orange Ice Cream Recipe adapted from Lottie + Doof

Nutrition

Calories: 297kcal | Carbohydrates: 25g | Protein: 5g | Fat: 21g | Saturated Fat: 12g | Polyunsaturated Fat: 1g | Monounsaturated Fat: 6g | Cholesterol: 177mg | Sodium: 108mg | Potassium: 158mg | Fiber: 0.2g | Sugar: 24g | Vitamin A: 930IU | Vitamin C: 10mg | Calcium: 105mg | Iron: 0.4mg

Meyer Lemon Souffle

Apr 2, 2013 · 18 Comments

A step by step tutorial on how to make a gorgeous and tall Meyer lemon souffle.

Meyer Lemon Souffle via LittleFerraroKitchen.com

Souffle Takes Patience and a bit of Courage

Souffle is deemed the  masterpiece of technique and the damsel of all things baking. The souffle is fragile, beautiful, delicate and oh so temperamental.

The first souffle I made was a savory cheese souffle and now for my 2nd souffle, a sweet lemon souffle was in order, since lemon desserts are some of my favorite flavors! As soon as meyer lemons are in season, lemon bars are always baked and this 4 ingredient no bake lemon pie is next on the list!

Meyer Lemon Souffle via LittleFerraroKitchen.com

The trick with both of the souffles, is the tin foil collar. I initially got this idea from Julia Child and it is the key in making a grand souffle. The collar helps guide the souffle over the mold and holds it up and in my case, you have a few extra minutes to snap a few photos before it begins to sink. Score!

Ingredients

  • Milk
  • Eggs
  • Meyer Lemons
  • Granulated Sugar
  • Cornstarch
  • Salt
  • Unsalted Butter
  • Vanilla Extract
  • Cream of Tartar
  • Confectioners’ Sugar

How to Make a Lemon Souffle

1) Preheat oven to 375 degrees F and position oven rack to the lower ⅔.

2) Make the lemon cream: In a medium pot, whisk together the egg yolks, milk, lemon juice and zest, cornstarch, sugar and salt. Over medium heat, whisk until the mixture begins to bubble, about 3-4 minutes. It will continue to get thicker, but constantly whisk it. Continue until it is very thick.

Meyer Lemon Souffle via LittleFerraroKitchen.com

3) Turn heat off and whisk in the butter and vanilla extract. Transfer the hot cream mixture to a large bowl filled with ice to help cool down the mixture. Whisk every few minutes until it gets to room temperature.

Meyer Lemon Souffle via LittleFerraroKitchen.com

4) Make the meringue (egg whites): In a stand mixer fitted with a whisk attachment, add egg whites. Start on low and work to medium speed. You will see the egg whites begin to "break up" and start to get foamy. Add cream of tartar and continue whisking.

Meyer Lemon Souffle via LittleFerraroKitchen.com

5) Continue whisking and gradually get a little faster. When whites are starting to form and are at "soft peaks" add confectioners sugar slowly, about 1Tb at a time while the whisk is going. Continue whisking until "stiff peaks" form.

Meyer Lemon Souffle via LittleFerraroKitchen.com

6) Next, place the egg whites and pastry cream bowl next to each other. Using a large, soft spatula take a large dollop of cream mixture and add it to the egg whites. Do not mix heavily, you want to FOLD it in. Fold by taking your spatula to the side the bowl then fold-up. You will see streaks of  yellow and continue folding gently. Add the rest of the cream mixture about ½ cup at a time until incorporated.

Meyer Lemon Souffle via LittleFerraroKitchen.com

.7) For the molds: Grease a 6 cup mold with softened butter all over and dust with powdered sugar.

*This recipe is enough for a 6 cup mold plus 2 small individual molds.

Meyer Lemon Souffle via LittleFerraroKitchen.com

8) Make the collar: Tear a long enough piece of tin foil that is long enough to wrap around the mold. Fold in half so it is not "too tall". Grease the inside of the foil with butter and wrap around mole, securing at handles.

Meyer Lemon Souffle via LittleFerraroKitchen.com

9) Pour the souffle mixture into the dish and level off the top. Wrap the foil around the mold. (Easier after your pour mixture in).

Meyer Lemon Souffle via LittleFerraroKitchen.com

10) Bake at 375 for exactly 20 minutes. No peeking! When done, dust with powdered sugar.

Meyer Lemon Souffle via LittleFerraroKitchen.com

More Delicious Desserts

  • Plate of homemade pistachio baklava doused in a honey syrup.
    Turkish Pistachio Baklava with Orange Blossom Syrup
  • Pear Fritters with Orange Glaze
  • Kadaif (Kadayif) Shredded Phyllo with Pistachios
  • Caramel eclairs with caramel sauce on top.
    Salted Caramel Eclairs
Print Recipe
4.86 from 34 votes

Meyer Lemon Souffle

A step by step tutorial, with pictures, on how to make a gorgeous and tall Meyer lemon souffle.
Prep Time10 minutes mins
Cook Time30 minutes mins
Total Time40 minutes mins
Course: Dessert
Cuisine: French
Keyword: lemon souffle, meyer lemon souffle
Servings: 4 servings
Calories: 281kcal
Author: Samantha Ferraro

Ingredients

Lemon pastry cream

  • 4 large egg yolks
  • 1 cup whole milk
  • ½ cup strained Meyer lemon juice + zest of 2 Meyer lemons
  • ½ cup granulated sugar
  • 3 Tb cornstarch
  • ¼ teaspoon salt
  • 1 Tb unsalted butter
  • 1 teaspoon vanilla extract

meringue

  • 8 large egg whites
  • ½ teaspoon cream of tartar
  • ¼ cup confectioners’ sugar + more for dusting
US Customary - Metric

Instructions

  • Pre-heat oven to 375 degrees F and position oven rack to the lower ⅔.
  • Make the lemon cream: In a medium pot, whisk together the egg yolks, milk, lemon juice and zest, cornstarch, sugar and salt. Over medium heat, whisk until the mixture begins to bubble, about 3-4 minutes. It will continue to get thicker, but constantly whisk it. Continue until it is very thick.
  • Turn heat off and whisk in the butter and vanilla extract. Transfer the hot cream mixture to a large bowl filled with ice to help cool down the mixture. Whisk every few minutes until it gets to room temperate.
  • Make the meringue (egg whites): In a stand mixer fitted with a whisk attachment, add egg whites. Start on low and work to medium speed. You will see the egg whites begin to "break up" and start to get foamy. Add cream of tartar and continue whisking.
  • Continue whisking and gradually get a little faster. When whites are starting to form and are at "soft peaks" add confectioners sugar slowly, about 1Tb at a time while the whisk is going. Continue whisking until "stiff peeks" form.
  • Next, place the egg whites and pastry cream bowl next to each other. Using a large, soft spatula take a large dollop of cream mixture and add it to the egg whites. Do not mix heavily, you want to FOLD it in. Fold by taking your spatula to the side0under-up. You will see streaks of yellow and continue folding gently. Add the rest of the cream mixture about ½c at a time until Incorporated.
  • For the molds: Grease a 6cup mold with softened butter all over and dust with powdered sugar.
  • *This recipe is enough for a 6cup mold plus 2 small individual molds.
  • Make the collar: Tear a long enough piece of tin foil that is long enough to wrap around the mold. Fold in half so it is not "too tall". Grease the inside of the foil with butter and wrap around mole, securing at handles.
  • Pour the souffle mixture into the dish and level off the top. Wrap the foil around the mold. (Easier after your pour mixture in).
  • Bake at 375 for exactly 20 minutes. No peeking! When done, dust with powdered sugar.

Notes

Enough for a 6 cup mold + 2 small individual molds.
Recipe adapted from Fine Cooking and Julia Child.

Nutrition

Calories: 281kcal | Carbohydrates: 45g | Protein: 12g | Fat: 10g | Saturated Fat: 5g | Polyunsaturated Fat: 1g | Monounsaturated Fat: 3g | Trans Fat: 0.1g | Cholesterol: 209mg | Sodium: 279mg | Potassium: 305mg | Fiber: 0.1g | Sugar: 29g | Vitamin A: 448IU | Vitamin C: 12mg | Calcium: 106mg | Iron: 1mg

Pear Grape Sangria

Mar 28, 2013 · 1 Comment

Pear grape sangria is a refreshing and fruity white wine cocktail.

Pear Grape Sangria via LittleFerraroKitchen.com

Asian pear, grapes and thyme pulled together to form a gorgeous sangria. If you can let it sit OVERNIGHT, please do!

That's when all the magic happens. To pair with the fruit, I added some St. Germaine which has pear flavors and it was pretty awesome. The fresh thyme offers a light and earthy touch and is a fabulous contrast with the other fruit.

Pear Grape Sangria via LittleFerraroKitchen.com
Print Recipe
5 from 3 votes

Pear Grape Sangria

Pear grape sangria is a refreshing and fruity white wine cocktail.
Prep Time10 minutes mins
Chilling4 hours hrs
Total Time4 hours hrs 10 minutes mins
Course: Drinks
Cuisine: Spanish
Keyword: pear sangria, white wine sangria, white wine sangria with pears
Servings: 8 servings
Calories: 177kcal
Author: Samantha Ferraro

Ingredients

  • 750 ml bottle white wine I used a white burgundy
  • ½ c St. Germaine
  • 2 Asian pears cut in thin strips
  • 1 ½ c seedless red grapes cut in half
  • Few sprigs of fresh thyme
  • Sparkling water optional
US Customary - Metric

Instructions

  • Add everything except for the sparkling water in a large pitcher and refrigerate for at least 4 hours, preferably overnight.
  • Serve and top with a touch of sparkling water if desired.

Nutrition

Calories: 177kcal | Carbohydrates: 20g | Protein: 0.4g | Fat: 0.1g | Saturated Fat: 0.03g | Polyunsaturated Fat: 0.1g | Monounsaturated Fat: 0.04g | Sodium: 6mg | Potassium: 173mg | Fiber: 2g | Sugar: 15g | Vitamin A: 30IU | Vitamin C: 3mg | Calcium: 15mg | Iron: 0.4mg

Classic Matzo Brei

Mar 19, 2013 · 1 Comment

Classic Matzo Brei for Passover brunch, made with soaked matzo that's gently scrambled with eggs and finished with a pinch of salt and a drizzle of syrup.

Classic Matzo Brie via LittleFerraroKitchen.com

There are no bells and whistles with this matzo dish. Nothing fancy and no fancy ingredients. It is simple, 'in your face'- 'give it t me now', matzo brei.

This is the way my Grandpa would make matzo brei when I was a kid . I would often spend the weekends with my grandparents when I was little and this was the first thing we woke up to on Saturday mornings. Before grandma and I shopped all day at the mall, grandpa was was already up making matzo brei.

What is Matzo Brei?

Matzo brei is simple and quick, and that's the beauty of it. It is basically just soaked matzo + egg that is scrambled together in butter and topped with syrup.

Nowadays, I've seen matzo brei being made in a bunch of different ways, such as a matzo brei fritatta and baking it or making it savory with fancy herbs. But honestly, when I think of matzo brei, I just want it exactly like grandpa made it. Egg+ matzo+ syrup, that's it.

How to make Matzo Brei

1) break up matzo and put in a wide dish ow bowl. Add enough water to cover matzo. Allow to soak for about 10 minutes.

Classic Matzo Brie via LittleFerraroKitchen.com

2) Drain water out, squeezing the matzo to make sure all the water is out. It will look mushy. Add whisked eggs and mix together. Add salt and pepper.

Classic Matzo Brie via LittleFerraroKitchen.com

3) Heat a skillet with butter and add matzo mixture. Scramble gently until eggs are light and fluffy.

Classic Matzo Brie via LittleFerraroKitchen.com

4) When done, plate up your matzo brei and drizzle good maple syrup on top.

Other favorite Passover Recipes

Lemon Saffron Matzo Ball Soup

Baklava Bimuelos

Slow Cooker Brisket with Red Wines and Onions

Print Recipe
4.80 from 5 votes

Classic Matzo Brei

Classic Matzo Brei for Passover brunch, made with soaked matzo that's gently scrambled with eggs and finished with a pinch of salt and a drizzle of syrup.
Prep Time10 minutes mins
Cook Time5 minutes mins
Total Time15 minutes mins
Course: Breakfast, Brunch
Cuisine: Jewish
Keyword: classic matzo brei, matzo brei, matzo brei recipe
Servings: 2 servings
Calories: 447kcal
Author: Samantha Ferraro

Ingredients

  • 2 matzo broken into pieces
  • 2 eggs whisked
  • 1 tablespoon butter
  • Salt to taste
  • Syrup for drizzling

Instructions

  • Break up matzo and put in a wide dish ow bowl. Add enough water to cover matzo. Allow to soak for about 10 minutes.
  • Drain water out, squeezing the matzo to make sure all the water is out. It will look mushy. Add whisked eggs and mix together. Add salt and pepper.
  • Heat a skillet with butter and add matzo mixture. Scramble gently until eggs are light and fluffy.
  • When done, plate up your matzo brei and drizzle good maple syrup on top.

Nutrition

Calories: 447kcal | Carbohydrates: 48g | Protein: 17g | Fat: 21g | Saturated Fat: 10g | Cholesterol: 357mg | Sodium: 225mg | Potassium: 184mg | Fiber: 2g | Sugar: 1g | Vitamin A: 825IU | Calcium: 49mg | Iron: 3mg

Spicy Asian Chicken Lettuce Wraps

Mar 3, 2013 · 2 Comments

Spicy Asian Chicken Lettuce wraps is a simple and incredibly flavorful dinner with shiitake mushrooms and ground chicken.

Spicy Asian Chicken Lettuce Wraps via LittleFerraroKitchen.com

This did come out to be a darn good chicken lettuce wrap. Joe was working late so I whipped up a few wraps for myself, added some extra sriracha and went to town with a cold beer. It was really darn...good.

Method:

1) Season chicken with salt and pepper and cut into small cubes and cook in an oiled pan until all cooked through. Reserve to a plate.

Spicy Asian Chicken Lettuce Wraps via LittleFerraroKitchen.com

2) Soak dried shiitake mushrooms in a bowl of hot water while you cook everything else. or about 15 minutes. Chop mushrooms when they are re hydrated.

Spicy Asian Chicken Lettuce Wraps via LittleFerraroKitchen.com

3) In the same pan as the chicken, wipe out clean and scramble eggs. When done, reserve to a plate.

4) Wipe out the same pan again and drizzle with oil. Saute garlic and ginger for about a minute until it begins to caramelize. Add a plash of rice vinegar and stir through.

Spicy Asian Chicken Lettuce Wraps via LittleFerraroKitchen.com

5) Add back the chicken, carrots, mushrooms and bamboo shoots and and stir all together for about 2 minutes so all the flavors blend.

Spicy Asian Chicken Lettuce Wraps via LittleFerraroKitchen.com

6) Add back eggs and stir through.

Spicy Asian Chicken Lettuce Wraps via LittleFerraroKitchen.com

7) Add soy sauce, sriracha and hoisin and stir well. Taste for seasoning.

Spicy Asian Chicken Lettuce Wraps via LittleFerraroKitchen.com

8) When done, load up chicken mixture into crisp iceberg lettuce cups.

Spicy Asian Chicken Lettuce Wraps via LittleFerraroKitchen.com

Ingredients

  • Chicken Breasts
  • Carrot 
  • Bamboo Shoots
  • Garlic Cloves 
  • Ginger
  • Eggs
  • Dried Shitake Mushrooms
  • Rice Wine Vinegar
  • Soy Sauce
  • Hoisin Sauce
  • Sriracha
  • Salt and Pepper 
  • Oil
  • Iceberg Lettuce

Instructions

  1. Season chicken with salt and pepper and cut into small cubes and cook in an oiled pan until all cooked through. Reserve to a plate.
  2. Soak dried shiitake mushrooms in a bowl of hot water while you cook everything else. or about 15 minutes. Chop mushrooms when they are re hydrated.
  3. In the same pan as the chicken, wipe out clean and scramble eggs. When done, reserve to a plate.
  4. Wipe out the same pan again and drizzle with oil. Saute garlic and ginger for about a minute until it begins to caramelize. Add a splash of rice vinegar and stir through.
  5. Add back the chicken, carrots, mushrooms and bamboo shoots and and stir all together for about 2 minutes so all the flavors blend.
  6. Add back eggs and stir through.
  7. Add soy sauce, sriracha and hoisin and stir well. Taste for seasoning.
  8. When done, load up chicken mixture into crisp iceberg lettuce cups.

More finger food inspiration

  • Roasted Vegetable and Romesco Crostini
  • Falafel Collard Wrap With All The Fillings
  • Heirloom Tomato Galette with Arugula Pesto
  • Potato knishes with sesame seeds on top.
    Spinach and Potato Knish with Caramelized Onions
Print Recipe
5 from 5 votes

Spicy Asian Chicken Lettuce Wraps

Spicy Asian Chicken Lettuce wraps is a simple and incredibly flavorful dinner with shitake mushrooms and ground chicken.
Prep Time15 minutes mins
Cook Time15 minutes mins
Total Time30 minutes mins
Course: Appetizer, Main
Cuisine: Asian
Keyword: chicken lettuce wraps
Servings: 4 servings
Calories: 221kcal
Author: Samantha Ferraro
Cost: $10

Ingredients

  • 2 chicken breasts cut into small chunks
  • 1 carrot peeled and chopped
  • 1 small can bamboo shoots chopped
  • 2 garlic cloves chopped
  • 1 in piece ginger peeled and shredded (using micro-plane)
  • 2 eggs whisked
  • 4-5 dried shitake mushrooms
  • 1 Tb rice wine vinegar
  • 3 Tb soy sauce
  • ¼ cup hoisin sauce
  • 2 Tb sriracha optional
  • Salt and pepper to taste
  • Oil for drizzling
  • Iceberg lettuce leaves seperated
US Customary - Metric

Instructions

  • Season chicken with salt and pepper and cut into small cubes and cook in an oiled pan until all cooked through. Reserve to a plate.
  • Soak dried shitake mushrooms in a bowl of hot water while you cook everything else. or about 15 minutes. Chop mushrooms when they are re hydrated.
  • In the same pan as the chicken, wipe out clean and scramble eggs. When done, reserve to a plate.
  • Wipe out the same pan again and drizzle with oil. Saute garlic and ginger for about a minute until it begins to caramelize. Add a plash of rice vinegar and stir through.
  • Add back the chicken, carrots, mushrooms and bamboo shoots and and stir all together for about 2 minutes so all the flavors blend.
  • Add back eggs and stir through.
  • Add soy sauce, sriracha and hoison and stir well. Taste for seasoning.
  • When done, load up chicken mixture into crisp iceberg lettuce cups.

Nutrition

Calories: 221kcal | Carbohydrates: 12g | Protein: 29g | Fat: 6g | Saturated Fat: 1g | Polyunsaturated Fat: 1g | Monounsaturated Fat: 2g | Trans Fat: 0.02g | Cholesterol: 155mg | Sodium: 1378mg | Potassium: 585mg | Fiber: 1g | Sugar: 6g | Vitamin A: 2712IU | Vitamin C: 8mg | Calcium: 35mg | Iron: 1mg

Herb Roasted Pork with Root Vegetables

Feb 28, 2013 · 8 Comments

An easy and gorgeous dinner with herbes de Provence roasted pork with caramelized root vegetables and a sweet and savory balsamic reduction.

An easy and gorgeous dinner with herbes de Provence roasted pork loin, caramelized root vegetables and a sweet and savory balsamic reduction.

Today is the kick off to Pass the Cook Book Club! Oh..what is this you ask? Well, its the coolest book club ever! Kita thought of this idea as she wanted to start dustin off some of her cookbooks. So, she got a bunch of fabulous cooks together, picked out a few recipes from 1 book and we all make them! Pretty neat-o huh?

Today's recipe is from The Pioneer Woman Cooks. Most of us bloggers know her because she is the American Blogger Story, from blogger to TV show, from "rags to riches"..you know. But if you don't, she has the new Food Network show and countless books. I was excited to make this dish because it was rustic and simple. Pork loin is lean and the seasonings were already in my cupboard. I bought gorgeous in season vegetables and chopped them up just as she does, and boy..what a difference cutting vegetables small makes...you eat every single one of them!

For a simple sauce, I reduced leftover fig jam (but you can use whatever jam you have really), with a little water and few tablespoons of balsamic vinegar. It got thick and sweet and was perfect with the pork and vegetables.

An easy and gorgeous dinner with herbes de Provence roasted pork loin, caramelized root vegetables and a sweet and savory balsamic reduction.
Herb Roasted Pork with Root Vegetables via LittleFerraroKitchen.com
Print Recipe
5 from 10 votes

Herb Roasted Pork with Root Vegetables

An easy and gorgeous dinner with herbes de Provence roasted pork with caramelized root vegetables and a sweet and savory balsamic reduction.
Servings: 4 servings
Calories: 555kcal
Author: Samantha Ferraro

Ingredients

Pork:

  • 1 pork tenderloin about 1 1-2 lbs
  • ¼ cup Herbes de Provence
  • Salt and pepper to taste
  • Olive oil for drizzling

Sauce

  • 1 cup preserves fig, blueberry, any
  • 2 Tb balsamic vinegar
  • 1 Tb water

Root Vegetables

  • 1 turnip peeled
  • 6 carrots peeled
  • 3 parsnips peeled
  • Salt and pepper to taste
  • Olive oil for drizzling
US Customary - Metric

Instructions

  • Chop all your root vegetables into 1 in pieces. Arrange on a foiled lined baking sheet and drizzle with olive oil and salt and pepper. Roast in oven at 450 degrees F for about 20 minutes until beginning to caramelize.
  • In a small roasted dish, place pork loin and run with herbes de provence all over. Season with salt and pepper and drizzle with a little olive oil. Roast in the oven for about 30 minutes depending on its thickness.
  • To make the sauce, in a small sauce pan, add the preserves, vinegar and water. Bring to a boil and whisk. Allow to boil for about 3 minutes and then bring down to a simmer.The sauce should be thicker and able to coat the back of a spoon.
  • When done, arrange plate with slice pork and vegetables and drizzle sauce on top.

Notes

Recipe from The Pioneer Woman Cooks

Nutrition

Calories: 555kcal | Carbohydrates: 101g | Protein: 31g | Fat: 4g | Saturated Fat: 1g | Polyunsaturated Fat: 1g | Monounsaturated Fat: 1g | Trans Fat: 0.03g | Cholesterol: 82mg | Sodium: 199mg | Potassium: 1485mg | Fiber: 15g | Sugar: 54g | Vitamin A: 15848IU | Vitamin C: 46mg | Calcium: 386mg | Iron: 21mg

Aloo Gobi (Indian Spiced Cauliflower)

Feb 23, 2013 · Leave a Comment

Aloo Gobi is a delicious and spicy vegetarian Indian dish with chunky potatoes and cauliflower and flavors of turmeric and jalapeno.

Aloo Gobi (Spiced Indian Cauliflower) via LittleFerraroKitchen.com

This recipe is called "Aloo Gobi" and is basically Indian spiced cauliflower and potatoes. I had a head of cauliflower that I got at the farmers market and was craving something spicy and exotic. Usually, I roast the cauliflower just like I do with brussel sprouts, which is absolutely delicious too. After some searching I found this amazing recipe and video. I was intrigued an

d hungry. I used the spices I had on hand, which is most oft he ones called in the recipe; ginger, turmeric, cayenne and coriander. It is easy if you have the spices on hand.

The turmeric paints the florets so everything comes out beautiful and yellow. The sliced jalapeno and cayenne offer enough spice to do a little pucker.

I absolutely love, love this dish. We paired it with Indian spiced chicken burgers and licked our fingers (burgers coming later).

Method:

1) If you haven't already, cut cauliflower into small florets. Cut potato in ½in thin wedges.

Aloo Gobi (Spiced Indian Cauliflower) via LittleFerraroKitchen.com


2) In a small bowl, mix grated ginger, coriander, turmeric, cayenne with 3 Tb of water. Set aside.

Aloo Gobi (Spiced Indian Cauliflower) via LittleFerraroKitchen.com

3) In a large skillet, heat olive oil  and add bay and jalapeno. Cook for about a minute.

Aloo Gobi (Spiced Indian Cauliflower) via LittleFerraroKitchen.com

4) Add spice mixture, bring to a simmer and reduce.

Aloo Gobi (Spiced Indian Cauliflower) via LittleFerraroKitchen.com

5) Add cauliflower and potatoes and another 3 Tb of water. Season with salt and pepper. Cover and allow to cook for about 15 minutes until the vegetables are tender. Toss midway through.

Aloo Gobi (Spiced Indian Cauliflower) via LittleFerraroKitchen.com

4) When done, garnish with fresh cilantro.

Aloo Gobi (Spiced Indian Cauliflower) via LittleFerraroKitchen.com
Print Recipe
5 from 3 votes

Aloo Gobi (Indian Spiced Cauliflower)

Aloo Gobi is a delicious and spicy vegetarian Indian dish with chunky potatoes and cauliflower and flavors of turmeric and jalapeno.
Prep Time10 minutes mins
Cook Time20 minutes mins
Total Time30 minutes mins
Course: Side Dish
Cuisine: Indian
Keyword: aloo gobi
Servings: 4 servings
Calories: 120kcal
Author: Samantha Ferraro

Ingredients

  • 1 head of cauliflower cut into florets and hard stems removed
  • 2 cup of white or red potatoes cut into ½ in wedges
  • ½ in ginger peeled and grated
  • 2 teaspoon coriander
  • ½ teaspoon turmeric
  • ¼ teaspoon cayenne
  • 2 dried bay leaves
  • 1 jalapeno seeds removed and cut into thin strips
  • 6 Tb water divided
  • Olive oil for drizzling
  • Salt and pepper to taste
US Customary - Metric

Instructions

  • If you haven't already, cut cauliflower into small florets. Cut potato in ½in thin wedges.
  • In a small bowl, mix grated ginger, coriander, turmeric, cayenne with 3 Tb of water. Set aside.
  • In a large skillet, heat olive oil and add bay and jalapeno. Cook for about a minute.
  • Add spice mixture, bring to a simmer and reduce.
  • Add cauliflower and potatoes and another 3 Tb of water. Season with salt and pepper. Cover and allow to cook for about 15 minutes until the vegetables are tender. Toss midway through.
  • When done, garnish with fresh cilantro.

Notes

Recipe inspired by Manjula's Kitchen

Nutrition

Calories: 120kcal | Carbohydrates: 26g | Protein: 5g | Fat: 1g | Saturated Fat: 0.2g | Polyunsaturated Fat: 0.1g | Monounsaturated Fat: 0.1g | Sodium: 51mg | Potassium: 895mg | Fiber: 5g | Sugar: 4g | Vitamin A: 98IU | Vitamin C: 95mg | Calcium: 47mg | Iron: 2mg

{Guest Post} Paneer Tikka Masala

Jan 25, 2013 · 8 Comments

A step by step guide to making Paneer Tikka Masala recipe, a gorgeous Indian dish made with thick paneer cheese, yogurt, peppers and colorful spices.

A step by step guide to making Paneer Tikka Masala recipe, a gorgeous Indian dish made with thick paneer cheese, yogurt, peppers and colorful spices.

A step by step guide to making Paneer Tikka Masala recipe, a gorgeous Indian dish made with thick paneer cheese, yogurt, peppers and colorful spices.

I have such a treat for you today. Vijay who reins  as the Editor and Chief of one of my favorite new and upcoming websites, Nosh on It is guess posting for us today! Nosh on It features hand-picked recipes and expert cooking tips from amazing up-and-coming bloggers so you don’t have to think about what to make for dinner! What I enjoy most about their site is that each day of the week features a different cuisine, such as Wednesday which is "World Cuisine Day" and the day I shared my Mom's grape leaves!

If you want to try out their emails, just head over here:http://subscribe.noshon.it. And on Facebook!

A step by step guide to making Paneer Tikka Masala recipe, a gorgeous Indian dish made with thick paneer cheese, yogurt, peppers and colorful spices.

As most people know, I have a pretty deep fascination with international foods and really believe that we can learn all about different cultures from their foods. Beautiful dishes from around the world are passed down to generations with love, respect and history and Indian food is something I am slowly venturing into. The colors are vibrant, the spices are exotic and their cuisine is tempting.

Today, Vijay is here to introduce this traditional Indian dish with a simple step by step guide! Gosh I am excited!

------------------------------------------------------------------------------------------------------------------------------
Hi everyone! My name is Vijay and I’m the Editor and “Chief Nosher” at NoshOn.It, a daily email to inspire you to cook just a little bit better each and every day. I’m really excited to be posting over here today because Samantha and I share a special bond over the love of cooking foods from around the world. I truly believe that the best way to explore a new culture (whether you can visit the place or not) is through its food. So, today, I want to share with you one of my favorite Indian dishes: Paneer Tikka Masala.

If you’ve ever had Chicken Tikka Masala, think of this dish as its vegetarian cousin. Paneer, an Indian cheese, is marinated in yogurt and a blend of spices then sauteed until crispy. In a different pot, you make a silky, creamy sauce with onions, garlic, ginger, tomatoes, and spices then combine it all together for an absolutely delicious dish. I’m going to venture to say that this is even better than what you get in restaurants!

To be perfectly honest, this is not a dish I grew up eating at home. Over the years, I’ve just come to appreciate the combination of textures and flavors so I figured it was about time to figure it out how to make paneer tikka masala for myself.

And, if you think Indian food is too difficult to make at home, I’m here to prove to you that it’s not! All you need is a well-stocked spice cabinet and a little know-how, which is why I’m going to walk you through it step-by-step. Don’t be scared by the long list of ingredients - it comes together in 30 minutes (after the marinade). So, let’s get started!
Method:
1) Gather the ingredients to marinate the paneer. You should be able to get all of the spices and paneer at any Indian grocery store and maybe even at your local grocery store if they have a well-stocked ethnic aisle. Be sure to use greek yogurt since it’s thicker. If you’ve never heard of Tandoori spice, it’s a combo of cumin, coriander, paprika, chili powder, and other spices.

A step by step guide to making Paneer Tikka Masala recipe, a gorgeous Indian dish made with thick paneer cheese, yogurt, peppers and colorful spices.

2) Mix all of the marinade ingredients together, add the paneer and bell peppers, cover, and marinate in the fridge for an hour if you can.

3) Get the ingredients together for the rest of the dish. To make the ginger garlic paste, just add equal parts chopped ginger and chopped garlic into a blender with enough oil or water to puree.

A step by step guide to making Paneer Tikka Masala recipe, a gorgeous Indian dish made with thick paneer cheese, yogurt, peppers and colorful spices.


4) After the paneer has marinated for an hour, coat the bottom of a saute pan with oil, heat on medium-high, and add the paneer and vegetables. Saute, flipping every few minutes, until the paneer gets a nice charred crust. Set aside.

A step by step guide to making Paneer Tikka Masala recipe, a gorgeous Indian dish made with thick paneer cheese, yogurt, peppers and colorful spices.

5) In a separate large pan, add a few tablespoons of oil, heat, and add the cumin seeds. Once they start sizzling, add the onions and cook until browned. Add a pinch of salt. Add the ginger-garlic paste, stir  for 30 seconds, then sprinkle with flour. Cook for 1 minute then add the pureed tomatoes.

A step by step guide to making Paneer Tikka Masala recipe, a gorgeous Indian dish made with thick paneer cheese, yogurt, peppers and colorful spices.

6) This is the most important step. Once the tomatoes have started to darken, add the remaining spices and cook, stirring often, until the mixture is almost a paste and you see a bit of oil oozing out, 10-15 minutes. If you don’t let the tomatoes cook enough, the flavor won’t be as deep.

A step by step guide to making Paneer Tikka Masala recipe, a gorgeous Indian dish made with thick paneer cheese, yogurt, peppers and colorful spices.

7) Add enough water to make a sauce (for me, it was 2-3 cups), simmer for 5 minutes, then add a sprinkle of garam masala. Add the cooked paneer and peppers and cook for another 5 minutes.

A step by step guide to making Paneer Tikka Masala recipe, a gorgeous Indian dish made with thick paneer cheese, yogurt, peppers and colorful spices.

8) Finish with a drizzle of cream to soften the bite and ta-da! You’ve just made an Indian restaurant classic at home!

A step by step guide to making Paneer Tikka Masala recipe, a gorgeous Indian dish made with thick paneer cheese, yogurt, peppers and colorful spices.

9) Serve with naan bread (I like the frozen kind from Trader Joe’s) and a wedge of lime. Enjoy!

A step by step guide to making Paneer Tikka Masala recipe, a gorgeous Indian dish made with thick paneer cheese, yogurt, peppers and colorful spices.

------------------------------------------------------------------------------------------------------------------------------

Thank you Vijay for making such a gorgeous and authentic paneer tikka masala recipe. I will be sure to visit an Indian market and making this ASAP!

And be sure to follow Nosh On It on Facebook and Twitter too!

A step by step guide to making Paneer Tikka Masala recipe, a gorgeous Indian dish made with thick paneer cheese, yogurt, peppers and colorful spices.
Print Recipe
5 from 8 votes

Paneer Tikka Masala

Prep Time1 hour hr
Cook Time20 minutes mins
Total Time1 hour hr 20 minutes mins
Course: Main Course
Cuisine: Indian
Servings: 4 servings
Calories: 1810kcal
Author: Samantha Ferraro

Ingredients

Paneer Marinade:

  • 16 oz. paneer cut into 1” cubes (if you can’t find paneer, you can make your own or use extra firm tofu).
  • 1 small green bell pepper cut into 1” cubes
  • 1 small red bell pepper cut into 1” cubes
  • ⅓ cup Greek yogurt
  • ½ teaspoon turmeric
  • 1 ½ tsp. tandoori spice powder
  • Juice of ½ lime
  • 1 teaspoon vegetable oil

Sauce:

  • 2 teaspoon cumin seeds
  • 1 medium yellow onion finely diced
  • 1 tablespoon minced ginger + 1 tablespoon minced garlic blended into a paste with oil
  • 2 teaspoon all-purpose flour
  • 3 plum tomatoes stem removed, and pureed in a blender
  • 2-3 cups water
  • 1 tablespoon coriander powder
  • 1 tablespoon tandoori spice powder
  • ½ teaspoon turmeric
  • 1 teaspoon garam masala powder optional
  • ¼ cup heavy cream
  • Cilantro and lime for garnish
US Customary - Metric

Instructions

  • Combine all marinade ingredients in a bowl and marinate in the fridge for at least 1 hour. You can do shorter but the paneer won’t have the same flavor.
  • After the paneer has marinated, coat the bottom of a large saute pan with vegetable oil. Heat until shimmering then add the marinated paneer and peppers. Allow to cook on one side for 3-4 minutes then flip and continue cooking until deep golden brown on all sides, about 10 minutes total. Set aside.
  • In a separate large pan, heat 2 tablespoons of vegetable oil until shimmering. Add the cumin seeds.
  • When the cumin seeds start sizzling, add the onions and a pinch of salt. Saute until the onions are golden brown, 5-6 minutes.
  • Add the ginger-garlic paste and cook for 30 seconds.
  • Sprinkle the flour over the mixture and cook, stirring constantly, for 1 minute.
  • Add the pureed tomatoes and mix to incorporate, scraping the bits off the bottom of the pan.
  • After about 5 minutes once the tomatoes have darkened slightly, add the coriander powder, tandoori spice powder, and turmeric.
  • Stir to combine and cook, stirring often, until the tomatoes have turned into a paste and you see a bit of oil oozing out, 10-15 minutes. Don’t rush this step!
  • Add enough water to make a sauce. It was 2-3 cups for me but you can make it as thin or thick as you like. Stir to combine and simmer for 5 minutes.
  • Add the garam masala and the reserved panner and peppers. Simmer for another 5 minutes.
  • Add the heavy cream, a sprinkle of cilantro, a squeeze of lime, and you’re ready to eat!
  • Serve with naan bread or rice.

Nutrition

Calories: 1810kcal | Carbohydrates: 70g | Protein: 82g | Fat: 139g | Saturated Fat: 83g | Polyunsaturated Fat: 2g | Monounsaturated Fat: 7g | Cholesterol: 370mg | Sodium: 216mg | Potassium: 1709mg | Fiber: 22g | Sugar: 23g | Vitamin A: 7023IU | Vitamin C: 285mg | Calcium: 2801mg | Iron: 14mg

Homemade Tortillas

Jan 20, 2013 · 2 Comments

Step by step tutorial on how to make homemade tortillas.

Homemade Tortillas via LittleFerraroKitchen.com

We usually get these delicious homemade tortillas from a local market. They are somewhat thick and heat up perfectly on the pizza stone we have in the oven.

Homemade tortillas are made from masa, which is ground corn that has been dried, soaked in lime juice and then ground again. I found masa harina, which is translated to "dough flour" in Spanish.

It is easily reconstituted with liquid, and in this case, water. It forms into a slightly sticky ball and is easily molded. All I did was round a medium sized ball between my hands and pressed it between the tortilla press.

How to Make Homemade Tortillas

1) In a large bowl, whisk together the masa and salt.

Homemade Tortillas via LittleFerraroKitchen.com

2) Add 2 cups of water and mix together with your hands until a ball forms. It should feel slightly sticky and not too dry. Add more water if needed.

*I added a little more than 2 cups of water because it was a very dry day.

Homemade Tortillas via LittleFerraroKitchen.com

3) Cover the dough with a damp paper towel or dish towel and allow to rest for about 20-30 minutes.

Homemade Tortillas via LittleFerraroKitchen.com

4) Line your tortilla press with wax or parchment paper and roll a medium sized ball. About 2 Tb worth.

Homemade Tortillas via LittleFerraroKitchen.com

5) Press tortilla into the press until it flattens and use the wax paper to gently peel it off.

Homemade Tortillas via LittleFerraroKitchen.com

6) Place tortillas on a damp kitchen towel and cover while you're making the rest.

Homemade Tortillas via LittleFerraroKitchen.com

7) Heat a large cast-iron skillet (or non-stick skillet) on medium and lightly brush with olive oil.

Homemade Tortillas via LittleFerraroKitchen.com

8) Cook tortillas in skillet for 2 minutes each side.

Homemade Tortillas via LittleFerraroKitchen.com

9) Keep warm in a lightly damp towel until ready.

Homemade Tortillas via LittleFerraroKitchen.com

Recipes that go great with Tortillas:

  • Recipe for Dutch oven roast chicken with lemon, herbs and vegetables.
    Dutch Oven Roast Chicken
  • Caramelized onion stuffed mushrooms with Gruyere cheese and crispy panko breadcrumbs.
    French Onion Stuffed Mushrooms
  • Fried eggplant and other sabich fillings are layered between buttery and flaky puff pastry.
    Sabich Sandwich with Fried Eggplant and Tahini
  • Grilled chimichurri lamb chops served over a creamy herb yogurt sauce.
    Grilled Lamb Chops with Mint Chimichurri
  • Sweet blueberry borekas with sweet honey tahini glaze.
    Sweet Bourekas with Blueberries, Apples and Honey Tahini
  • Serve roasted figs with creamyy yogurt.
    Red Wine Roasted Figs with Honey and Rosemary
  • Charred tomato salasa with tomatillo, garlic and cilantro.
    Charred Tomato and Tomatillo Salsa
  • Grilled balsamic steak kabobs with vegetables and served with chimichurri.
    Grilled Balsamic Steak Kabobs
Print Recipe
5 from 4 votes

Homemade Tortillas

Step by step tutorial on how to make homemade tortillas.
Prep Time10 minutes mins
Cook Time20 minutes mins
Total Time30 minutes mins
Course: Side Dish, Snack
Cuisine: Mexican
Keyword: homemade tortillas
Servings: 12 tortillas
Calories: 35kcal
Author: Samantha Ferraro

Ingredients

  • 1 cups masa harina
  • 2 cups warm water plus more if needed
  • 1 teaspoon salt
  • Olive oil for skillet
US Customary - Metric

Instructions

  • In a large bowl, whisk together the masa and salt.
  • Add 2 cups of water and mix together with your hands until a ball forms. It should feel slightly sticky and not too dry. Add more water if needed.
  • *I added a little more than 2 cups of water because it was a very dry day.
  • Cover the dough with a damp paper towel or dish towel and allow to rest for about 20-30 minutes.
  • Line your tortilla press with wax or parchment paper and roll a medium sized ball. About 2 Tb worth.
  • Press tortilla into the press until it flattens and use the wax paper to gently peel it off.
  • Place tortillas on a damp kitchen towel and cover while you're making the rest.
  • Heat a large cast-iron skillet (or non-stick skillet) on medium and lightly brush with olive oil.
  • Cook tortillas in skillet for 2 minutes each side.
  • Keep warm in a lightly damp towel until ready.

Nutrition

Calories: 35kcal | Carbohydrates: 7g | Protein: 1g | Fat: 0.4g | Saturated Fat: 0.1g | Polyunsaturated Fat: 0.2g | Monounsaturated Fat: 0.1g | Sodium: 196mg | Potassium: 25mg | Fiber: 1g | Vitamin A: 20IU | Calcium: 14mg | Iron: 1mg

Homemade TV Dinner

Jan 20, 2013 · 33 Comments

Homemade TV Dinner with all the fixins, including mashed potatoes, meatloaf, peas and carrots and fruit crumble.

Retro-Redo: Homemade TV Dinner via LittleFerraroKitchen.com

It didn't take me long to figure out what I was going to make for this weeks Sunday Supper theme. I mean, come on, retro is where its at! I am sure we all have fond memories of classic TV dinners and i wanted to bring that nostalgia and history of such a revolutionary time.

We may turn up our noses now to those pre-made boxed meals,but TV dinners were a true revelation. Back in 1954, Swanson came out with the first TV dinners at the same time as  modern appliances, such as the huge popularity of the TV. According to TLC, the start of TV dinners was an answer to a problem with Thanksgiving leftovers! Swanson had tons of Thanksgiving leftovers and needed a way to use them up. One of Swanson's salesman, Gerry Thomas just traveled via Pan Am where he saw tin trays with compartments. So the Swanson brothers took that idea and loaded up the compartment tin trays. A campaign followed and ever since, TV dinners were an instant hit!

Retro-Redo: Homemade TV Dinner via LittleFerraroKitchen.com

The revolutionary thing about TV dinners is that it allowed woman more free time. Towards the end of WWII, women were the usual home-keepers and cooks of the family.

So having dinner ready within minutes allowed women to find other hobbies and work. The 1960's also brought an addition to the TV dinner, dessert. By this time TV trays had protein, carbs, vegetable and dessert all in 1 package!

For today's Sunday Supper I made a just as easy, homemade TV dinner! Meatloaf made in muffin cups are perfect for portion control and cook up in less time than a larger loaf.

Mashed potatoes with sour cream and Parmesan hit the spot and sweet peas and carrots are tossed with a touch o butter...nothing better than classic! And of course we can't end without a sweet dessert of Pear and pomegranate crumble to make it truly feel like home.

Ain't that swell?

More comfort food

  • Classic Eggplant Parmesan recipe is a favorite comfort food. Peeled and fried eggplant is generously flavored with fresh herbs and Parmesan cheese that is then baked with layers of marinara and mozzarella.
    Classic Eggplant Parmesan
  • Puttanesca pasta with anchovies, capers, olives and garnished with basil.
    Linguine Puttanesca
  • Lobster mac and cheese with crispy breadcrumb topping.
    Lobster Mac and Cheese with Prosciutto and Spinach
Print Recipe
4.94 from 32 votes

Homemade TV Dinner

Homemade TV Dinner with all the fixins, including mashed potatoes, meatloaf, peas and carrots and fruit crumble.
Prep Time15 minutes mins
Cook Time45 minutes mins
Total Time1 hour hr
Course: Dinner, Main
Cuisine: American
Keyword: homemade tv dinner
Servings: 4 servings
Calories: 633kcal
Author: Samantha Ferraro

Ingredients

Meatloaf

  • 1 lb ground beef
  • 1 egg whisked
  • ½ c breadcrumbs
  • 2 Tb ketchup + more for topping
  • 1 Tb mustard
  • 1 teaspoon Worcestershire sauce
  • ½ onion chopped
  • 2 garlic cloves chopped
  • Salt and pepper to taste

Mashed Potatoes

  • ½ lb potatoes cut in half
  • ¼ c sour cream
  • ¼ c freshly grated Parmesan
  • Salt and pepper to taste
  • 1-2 Tb butter for topping

Peas and Carrots

  • 2 c carrots peeled and chopped
  • 2 c peas frozen or fresh
  • 2 Tb butter
  • Salt and pepper to taste
US Customary - Metric

Instructions

Meatloaf

  • In a large bowl, combine all ingredients and mix well.
  • Spray a muffin tin with cooking spray and use a tablespoon to full muffin cups. It should make about 9.
  • Spread 1 Tb of ketchup on top of each meatloaf and bake at 350 degrees for 45 minutes until edges begin to crisp.

Mashed Potatoes

  • Boil potatoes until fork tender, about 15 minutes.
  • Use a potato masher to mash potatoes and add sour cream, Parmesan and salt and pepper.
  • Top with extra pat of butter.

Peas and Carrots

  • Cook peas and carrots in boiling water under carrots are tender. About 15 minutes.
  • When done, drain and place vegetables back in pot. Toss with 2tb butter and allow the warm vegetables to melt butter.
  • Season with salt and pepper.

Notes

Find the recipe for pear crumble here. 

Nutrition

Calories: 633kcal | Carbohydrates: 41g | Protein: 31g | Fat: 38g | Saturated Fat: 17g | Polyunsaturated Fat: 2g | Monounsaturated Fat: 14g | Trans Fat: 2g | Cholesterol: 157mg | Sodium: 543mg | Potassium: 1059mg | Fiber: 8g | Sugar: 11g | Vitamin A: 11750IU | Vitamin C: 46mg | Calcium: 199mg | Iron: 5mg

Tahdig (Persian Rice)

Jan 5, 2013 · 77 Comments

Learn how to make perfect Persian rice called Tahdig with step by step instructions. Tah-dig is a Persian rice dish with a crispy bottom and saffron and turmeric.

Tah-Dig (Persian Rice) via LittleFerraroKitchen.com

See, this is more of a technique than a recipe. Persian rice only has 4 ingredients and still creates the most unusual and addictive rice dish you will ever want. Other variations have thinly sliced potato on the bottom as the tahdig, which I can not wait to try next! I've also seen a spaghetti tahdig and one with sour cherries too! Read my step by step below to learn how tahdig is made.

Persian rice aka Tahdig has been on my list for quite a while. It is a Persian style of rice that has a crispy bottom, which is the best part. The word "tahdig" means "bottom of the pot", which is exactly where the crispy layer is formed. The solid layers bright and golden and I've heard it's supposed to resemble the large and wide golden dessert. It is also said that the better your tahdig is, the more praise and "ooh's" you receive.

Tah-Dig (Persian Rice) via LittleFerraroKitchen.com

Ingredients

  • Basmati
  • Saffron
  • Oil
  • Turmeric

Method:

1) In a large bowl, rinse rice several times until the water drains clear. (I use this basmati rice).

Tah-Dig (Persian Rice) via LittleFerraroKitchen.com

2) Fill bowl with water again and add a large pinch of salt. Allow rice to soak for about 20 minutes while you boil water.

*Reserve 3 tablespoons of boiling water for later use.

*I've read/heard different soaking times, anywhere from no soaking to overnight.

Tah-Dig (Persian Rice) via LittleFerraroKitchen.com

3) Bring a large pot with 4 cups of water to a boil. Drain rice and add to boiling water. Allow to cook, uncovered on medium-high heat for exactly 8 minutes (Set your timer.) Skim the foam off the top.

Tah-Dig (Persian Rice) via LittleFerraroKitchen.com

4) When rice is done, it should begin to puff up, be soft on the outside and hard on the inside. Drain rice and rinse under cold water to stop the cooking.

Tah-Dig (Persian Rice) via LittleFerraroKitchen.com

5) Using a mortar and pestle, grind a large pinch of saffron until it becomes powdery. Dissolve saffron in reserved 3 tablespoons hot water and stir with a spoon. Set aside.

Tah-Dig (Persian Rice) via LittleFerraroKitchen.com


6) Heat a medium size non-stick skillet on medium high heat and add oil, 3 Tb water, turmeric and saffron liquid. Gently swirl pan around so bottom is fully coated.

Tah-Dig (Persian Rice) via LittleFerraroKitchen.com

7) Add rice back into the pan, making sure the entire bottom is covered. Using the back of your large spoon, poke holes into the rice mound being careful not to go all the way down. Allow to cook on medium-high for 10 minutes, you should see steam coming out.

Tah-Dig (Persian Rice) via LittleFerraroKitchen.com

8) Cover pan lid with a kitchen towel and close pan. The towel will catch any moisture from the rice. Allow to cook for another 35 minutes. When it's done, you should hear a sizzle and crackling sound.

Tah-Dig (Persian Rice) via LittleFerraroKitchen.com

9) To serve: remove lid and place plate on top, carefully inverting the pan so the bottom of the rice is up. Or you can scoop the rice out and break the tahdig apart and scatter around the edges.

Tah-Dig (Persian Rice) via LittleFerraroKitchen.com

*Disclaimer: This is a fickle dish. Every oven and stove temperature is different, therefore please pay close attention to your rice as it cooks. I used medium-high for creating the crispy rice crust, however if your stove is hotter and you sense it burning, then please lower temperature. Cooking is all about experimenting and variables.

More great rice recipes

  • Persian rice with dates, chopped pistachios and aromatic cardamom is steamed together with an additive and crunchy saffron crust called tahdig.
    Persian Rice with Dates and Pistachios
  • Greek rice pilaf with orzo and fresh dill.
    Greek Rice Pilaf with Orzo
  • Colorful jeweled rice with saffron and dried fruit and nuts.
    Persian Jeweled Rice
  • A decadent and impressive spiced rice dish that literally translates to "stuffing". Layered with warm spices of cinnamon and allspice, savory ground beef and toasted pine nuts.
    Lebanese Hashweh Rice (Spiced Rice with Ground Beef and Pine Nuts)
Print Recipe
4.91 from 144 votes

Tah-Dig (Persian Rice)

Recipe adapted from Turmeric and Saffron and many other Youtube searches
Prep Time20 minutes mins
Cook Time35 minutes mins
Total Time55 minutes mins
Course: Side Dish
Cuisine: Middle Eastern
Keyword: Persian rice, saffron rice, tah-dig, tahdig
Servings: 6 servings
Calories: 288kcal
Author: Samantha Ferraro

Ingredients

  • 2 cups basmati
  • 1 large pinch of saffron
  • 3 tablespoons canola oil
  • 1 teaspoon turmeric
US Customary - Metric

Instructions

  • In a large bowl, rinse rise several times until the water drains clear.
  • Fill bowl with water again and add a large pinch of salt. Allow rice to soak for about 20 minutes while you boil water. Reserve 3 tablespoons of boiling water for later use. *I've read/heard different soaking times, anywhere from no soaking to overnight.
  • Bring a large pot with 4 cups of water to a boil. Drain rice and add to boiling water. Allow to cook, uncovered on medium-high heat for exactly 8 minutes (Set your timer.) Skim the foam off the top.
  • When rice is done, it should begin to puff up, be soft on the outside and hard on the inside. Drain rice and rinse under cold water to stop the cooking.
  • Using a mortar and pestle, grind a large pinch of saffron until it becomes powdery. Dissolve saffron in reserved 3 tablespoons hot water and stir with a spoon. Set aside.
  • Heat a medium size non-stick skillet on medium high heat and add oil, 3 Tb plain water, turmeric and saffron liquid. Gently swirl pan around so bottom is fully coated.
  • Add rice back into the pan, making sure the entire bottom is covered. Using the back of your large spoon, poke holes into the rice mound being careful not to go all the way down. Allow to cook on medium-high for 10 minutes, you should see steam coming out.
  • Cover pan lid with a kitchen towel and close pan. The towel will catch any moisture from the rice. Allow to cook for another 35 minutes. When it's done, you should hear a sizzle and crackling sound.
  • To serve: remove lid and place plate on top, carefully inverting the pan so the bottom of the rice is up. Or you can scoop the rice out and break the tahdig apart and scatter around the edges.

Nutrition

Calories: 288kcal | Carbohydrates: 49g | Protein: 4g | Fat: 7g | Sodium: 3mg | Potassium: 80mg | Calcium: 17mg | Iron: 0.6mg

Roasted Kabocha Squash with Coconut Oil and Fried Sage

Dec 28, 2012 · 4 Comments

Roasted kabocha squash with healthy and sweet coconut and salty fried sage is the perfect vegan side dish!

Roasted Kabocha Squash with Coconut Oil and Fried Sage via LittleFerraroKitchen.com

Roasted delicata squash, cut into slices and then topped with sizzling brown butter, fried sage and freshly grated Parmigiano.

The squash is roasted and caramelized on the outside and tender on the inside and well, you can go wrong with brown butter and the cheese takes the dish over the top. For another wonderful side dish try my Tartiflette (French Potato and Cheese Casserole).

Roasted Kabocha Squash with Coconut Oil and Fried Sage via LittleFerraroKitchen.com

Method:

1) Prep and fry sage and set aside. You can learn how to fry sage here.

Roasted Kabocha Squash with Coconut Oil and Fried Sage via LittleFerraroKitchen.com

2) Next scrub the outside of the Kabocha squash and with a very sharp knife and someone who has some strong hands, carefully cut it in half and scoop out the seeds.

Roasted Kabocha Squash with Coconut Oil and Fried Sage via LittleFerraroKitchen.com

3) Lay the squash halves on their flat side and again with a sharp knife and a strong person, cut them into wedges.

Roasted Kabocha Squash with Coconut Oil and Fried Sage via LittleFerraroKitchen.com

4) Place squash on a foil lined baking sheet and drizzle with melted coconut oil, salt, pepper, curry and dust the top with brown sugar.

Roasted Kabocha Squash with Coconut Oil and Fried Sage via LittleFerraroKitchen.com

5) Roast in oven at 400 degrees Fahrenheit for a total of 30 minutes. Turn wedges over half way through.

6) When done, top with freshly grated Parmigiano and fried sage.

More squash recipes:

Stuffed Acorn Squash with Spiced Rice (Hashweh)

Mediterranean Lentil Stuffed Delicata Squash

Roasted Delicata Squash with Sage and Amaretti Cookies

Print Recipe
5 from 5 votes

Roasted Kabocha Squash with Coconut Oil and Fried Sage

Roasted kabocha squash with healthy and sweet coconut and salty fried sage is the perfect vegan side dish!
Prep Time10 minutes mins
Cook Time30 minutes mins
Total Time40 minutes mins
Course: Side Dish
Cuisine: American, Italian
Keyword: roasted kabocha squash
Servings: 4 servings
Calories: 209kcal
Author: Samantha Ferraro

Ingredients

  • 1 Kabocha squash
  • 4 tablespoons coconut oil melted
  • 1 tablespoon curry powder
  • 1 tablespoon brown sugar
  • Salt and pepper to taste
  • Freshly grated Parmigiano
  • Fried Sage
US Customary - Metric

Instructions

  • Fry sage leaves in hot oil for 1 minute until crisp, then set aside.
  • Next scrub the outside of the Kabocha squash and with a very sharp knife and someone who has some strong hands, carefully cut it in half and scoop out the seeds.
  • Lay the squash haves on their flat side and again with a sharp knife and a strong person, cut them into wedges.
  • Place squash on a foil lined baking sheet and drizzle with melted coconut oil, salt, pepper, curry and dust the top with brown sugar.
  • Roast in oven at 400 degrees Fahrenheit for a total of 30 minutes. Turn wedges over half way through.
  • When done, top with freshly grated Parmigiano and fried sage.

Nutrition

Calories: 209kcal | Carbohydrates: 23g | Protein: 2g | Fat: 14g | Saturated Fat: 12g | Polyunsaturated Fat: 0.4g | Monounsaturated Fat: 1g | Sodium: 11mg | Potassium: 815mg | Fiber: 4g | Sugar: 8g | Vitamin A: 3091IU | Vitamin C: 28mg | Calcium: 73mg | Iron: 2mg

Lavender Lemon Bars

Dec 12, 2012 · 11 Comments

Lavender lemon bars have a light and distinct floral background taste thanks to the beautiful dried lavender.

Lavender Lemon Bars via LittleFerraroKitchen.com

For this years sweet treat, I wanted to make something a little brighter and softer. I asked on Facebook a few weeks ago whether I should pair rosemary, thyme or lavender with the lemon bars and majority chose lavender, so I did. Though..watch out for rosemary and thyme, I think that would be a gorgeous combination too.

Ingredients

  • Butter
  • Sugar
  • Flour
  • Dried Lavender
  • Salt
  • Eggs 
  • Lemons
  • Powdered Sugar 

Instructions

  1. Preheat the oven to 350 degrees F. For the crust, cream the butter and sugar together in mixer until well incorporated.
  2. In another bowl, add together the flour, salt and lavender. Add flour mixture to butter mixture with mixer on low and mix until just incorporated.
  3. With floured hands, take dough and gather into a ball. Then flatten dough and form in a 9 x 13 baking dish, bringing up ½in on each side.
  4. Bake the dough for 20 minutes to give the crust a head start, then allow tochil for another 20 minutes before adding filling.
  5. For the filling, whisk together the eggs, sugar, lemon zest, lemon juice, and flour. Pour over the crust and bake for about 30 minutes, until the filling is set. Let cool to room temperature for at least 2 hours.
  6. Cut into triangles and dust with confectioners' sugar.

More sweet inspiration

  • dust the blueberry peach clafoutis with powdered sugar and serve by the slice.
    Peach and Blueberry Clafoutis
  • Small donuts are filled with sweet cooked pears and dusted with powdered sugar.
    Pear Donuts with Vanilla and Cinnamon
  • Plate of homemade pistachio baklava doused in a honey syrup.
    Turkish Pistachio Baklava with Orange Blossom Syrup
  • Pear Fritters with Orange Glaze
Print Recipe
5 from 12 votes

Lavender Lemon Bars

Lavender lemon bars have a light and distinct floral background taste thanks to the beautiful dried lavender.
Prep Time15 minutes mins
Cook Time50 minutes mins
Chilling2 hours hrs
Total Time3 hours hrs 5 minutes mins
Course: Dessert
Cuisine: American
Keyword: lemon bars with lavendar
Servings: 20 squares
Calories: 268kcal
Author: Samantha Ferraro
Cost: $10

Ingredients

For the crust:

  • ½ lb butter room temperature
  • ½ cup sugar
  • 2 cups flour
  • 1 Tb dried lavender
  • ⅛ teaspoon salt

For the filling:

  • 6 eggs room temperature
  • 2 cups sugar
  • 1 cup fresh lemon juice About 3-4 lemons
  • Zest of 2-3 lemons
  • 1 cup flour
  • powdered sugar for dusting
US Customary - Metric

Instructions

  • Preheat the oven to 350 degrees F. For the crust, cream the butter and sugar together in mixer until well incorporated.
  • In another bowl, add together the flour, salt and lavender. Add flour mixture to butter mixture with mixer on low and mix until just incorporated.
  • With floured hands, take dough and gather into a ball. Then flatten dough and form in a 9 x 13 baking dish, bringing up ½in on each side.
  • Bake the dough for 20 minutes to give the crust a head start, then allow tochil for another 20 minutes before adding filling.
  • For the filling, whisk together the eggs, sugar, lemon zest, lemon juice, and flour. Pour over the crust and bake for about 30 minutes, until the filling is set. Let cool to room temperature for at least 2 hours.
  • Cut into triangles and dust with confectioners' sugar.

Nutrition

Calories: 268kcal | Carbohydrates: 40g | Protein: 4g | Fat: 11g | Saturated Fat: 6g | Polyunsaturated Fat: 1g | Monounsaturated Fat: 3g | Trans Fat: 0.4g | Cholesterol: 73mg | Sodium: 107mg | Potassium: 54mg | Fiber: 1g | Sugar: 25g | Vitamin A: 358IU | Vitamin C: 5mg | Calcium: 16mg | Iron: 1mg

Ruby Red Beet Latkes with Cumin

Dec 10, 2012 · 35 Comments

Beet latkes are perfect for Hanukkah with a gorgeous bright red color and a warm cumin undertone.

Ruby Red Beet Latkes via LittleFerraroKitchen.com

I had so much fun  experimenting with this new latke recipe just for this event. Based on a whim and trip to the farmers market and voila...beet latkes was born..

Similar to my moms traditional latkes, but this time I wanted to try something different. Beets have such a gorgeous and deep color and I wanted to see how these would fry up.

I threw in some potato for that common feel and just a dusting of cumin, which paired perfectly with the sweetness of the beets.

More frying inspiration

  • Parsnip Latkes with Creme Fraiche and Caviar
  • Roman style fried artichokes. Crispy baby fried artichokes fried in olive oil served with flakey salt and lemon juice. #FriedArtichokes #RomanFriedArtichokes
    Roman Style Fried Artichokes
  • Fried Zucchini Pancakes
  • Savory Hatch Chile and Cheddar Donuts with Raspberry Wine Sauce
Print Recipe
5 from 37 votes

Ruby Red Beet Latkes with Cumin

Beet latkes are perfect for Hanukkah with a gorgeous bright red color and a warm cumin undertone.
Prep Time10 minutes mins
Cook Time30 minutes mins
Total Time40 minutes mins
Course: Side Dish
Cuisine: Jewish
Keyword: beet latkes, fried beet latkes
Servings: 10 latkes
Calories: 296kcal
Author: Samantha Ferraro

Ingredients

  • 3 medium red beets peeled
  • ½ red onion cut in quarters
  • 1 medium Yukon gold potato peeled
  • 3 eggs whisked
  • ¼ cup matzo meal
  • 1 teaspoon cumin
  • Salt and pepper to taste
  • Canola oil for frying
US Customary - Metric

Instructions

  • Using a food processor with the small shredding blade, shred the beets, potatoes and onion. Use a dark colored kitchen towel to ring out any excess water from the vegetables.
  • *There will be lots of moisture.
  • In a large bowl, add the beet mixture, eggs, matzo meal, cumin and salt and pepper together and mix well. I use my hands at this step.
  • Heat a large skillet with canola oil, about ¼in high. Make sure oil is hot before frying by testing with a small piece of vegetable. It should sizzle when its ready. Use a regular table spoon to scoop mixture and carefully placing it in the hot oil.
  • Allow to cook on first side for about 3 minutes and use a flat spatula to carefully turn latke over and cook other side for about 2-3 minutes/
  • Place latkes on paper toweled lined plate r wire rack.

Notes

Yields about 10 latkes

Nutrition

Calories: 296kcal | Carbohydrates: 45g | Protein: 14g | Fat: 7g | Saturated Fat: 2g | Polyunsaturated Fat: 2g | Monounsaturated Fat: 3g | Trans Fat: 0.03g | Cholesterol: 246mg | Sodium: 197mg | Potassium: 922mg | Fiber: 6g | Sugar: 10g | Vitamin A: 412IU | Vitamin C: 25mg | Calcium: 85mg | Iron: 4mg

L.A.Times Holiday Cookie Bake-Off Winner

Dec 7, 2012 · 5 Comments

A few days ago I had the honor of visiting and touring the L.A. Times building. I wanted to show you what we did that day and am still on a high from such an amazing day. About a month ago I submitted my famous rugelach recipe  and didn't hear anything back....until last week! "Congratulations, out of over 120 entries and 2500 votes"... I was in the top 10!

Thank you ALL for your votes and support.

The day started with a fasinating tour tour around the Time's building, showing where everyone works, the history and last but certainly my favorite, the test kitchen. The LA Times offers free tours of the building which is not something to miss if you are visiting Los Angeles.

The winners recipes will be published in the L.A. Times on December 15th, but for now, here are some pics of the fun-filled day.

This globe lies in the lobby of the Times building. On the floor, you can see a circular panel which is a painted compass. The tour also goes into the first 100 years of the Times history.

The winners cookies!

This is the beautiful face of Jenn Harris that is behind the twitter chat #weekendeats that L.A. Times Food hosts every

Monday morning.

Ready for our closeup!


Vegetable and Pancetta Quiche with Potato Crust

Nov 25, 2012 · 5 Comments

Vegetable and Pancetta Quiche with Potato Crust on LittleFerraroKitchen.com #GlutenFree

A colorful and gluten-free vegetable and pancetta quiche with a simple crust made of thinly sliced potatoes.

Vegetable and Pancetta Quiche with Potato Crust via LittleFerraroKitchen.com

I don't make quiche often. Normally we make Butternut Squash Prosciutto Breakfast Hash.

Actually, this was my first time, if you want to call it a quiche. Instead of the standard butter soaked pastry crust, this quiche layers thin potato slices all along the bottom.

Just like most of us days after Thanksgiving, I not only have a mountain worth of mashed potatoes left, enough to make my Easy Homemade Perogies, but potatoes leftover too. I thought it would be neat to use one of my favorite kitchen tools, a mandoline, and thinly slice potato rings, thus forming a delicious (and gluten free) crust. I had some leftover rosemary that I picked from school and sprinkled that all over the overlapping potato slices. I used the rest of the eggs, 1 zucchini, a handful of cherry tomatoes and salty pancetta that all helped clean out the fridge.

Vegetable and Pancetta Quiche with Potato Crust via LittleFerraroKitchen.com

The potato crust that edged out of the tart dish became crispy and addictive. Not to mention, this was pretty healthy...right? There is no flour or butter and if you chose to make it vegetarian, just omit the pancetta. But honestly....why would you?

Method:

1) Begin heating oven to 400 degrees Fahrenheit. Whisk eggs and milk together and season with salt and pepper, set aside.

2) In a non stick skillet, cook pancetta in 1Tb olive oil until fully cooked and brown. When done, remove and reserve in a paper-towel lined bowl.

Vegetable and Pancetta Quiche with Potato Crust via LittleFerraroKitchen.com

3) In the same pan, drain any excess oil that accumulated but save about 1Tb worth. Add zucchini, season lightly with salt and pepper and saute for2-3 minutes until zucchini begins to color but don't cook through. It should still be snappy. When done, reserve to separate plate.

Vegetable and Pancetta Quiche with Potato Crust via LittleFerraroKitchen.com

4) Using a mandoline on setting #3, carefully slice potatoes on the longer side or use a sharp knife to slice thin slices.

*My tip: be careful when using a mandoline, make sure it is secure and sturdy and when slicing with dominant hand, have hand flat so fingers are not curled under, risking cutting.

Vegetable and Pancetta Quiche with Potato Crust via LittleFerraroKitchen.com

5) Using a tart dish , drizzle olive oil and use a paper towel to smear oil all over the bottom and sides. Place potato slices all along the bottom and sides, slightly overlapping and making sure all seams are closed. Sprinkle with rosemary and drizzle with olive oil and bake in oven for 10 minutes.

Vegetable and Pancetta Quiche with Potato Crust via LittleFerraroKitchen.com

Vegetable and Pancetta Quiche with Potato Crust via LittleFerraroKitchen.com

Vegetable and Pancetta Quiche with Potato Crust via LittleFerraroKitchen.com

6) Remove potato crust from oven and lower to 350 degrees. Pour in whisked eggs first and then add sliced zucchini, pancetta and cherry tomatoes. Top with shredded cheese and bake for 30 minutes.

Vegetable and Pancetta Quiche with Potato Crust via LittleFerraroKitchen.com

More great brunch recipes

  • Butternut Squash Prosciutto Breakfast Hash
  • Sephardic Spinach Pie with Parmesan and Feta
  • Spring Shakshuka with Ramps, Herbed Yogurt and Spiced Butter
  • Savory Blintzes with Mozzarella and Pesto

More fun brunch recipes

Stuffed Challah French Toast

Matzo Brei Eggs Benedict with Lox

Vegetable and Pancetta Quiche with Potato Crust on LittleFerraroKitchen.com #GlutenFree
Print Recipe
5 from 9 votes

Vegetable and Pancetta Quiche with Potato Crust

A colorful and gluten-free vegetable and pancetta quiche with a simple crust made of thinly sliced potatoes.
Prep Time10 minutes mins
Cook Time50 minutes mins
Total Time1 hour hr
Course: Breakfast, Brunch
Cuisine: American
Keyword: gluten free vegetable quiche, quiche with potato crust, vegetable quiche
Servings: 6 servings
Calories: 209kcal
Author: Samantha Ferraro

Ingredients

  • 2 small-medium white potato
  • 5 eggs + 1 Tb milk
  • 4 oz pancetta chopped
  • 1 zucchini sliced thin
  • ½ cup cherry tomatoes cut in half
  • ½ cup shredded cheese
  • 1 Tb fresh rosemary chopped
  • Olive oil for drizzling
  • Salt and pepper to taste
US Customary - Metric

Instructions

  • Begin heating oven to 400 degrees Fahrenheit. Whisk eggs and milk together and season with salt and pepper, set aside.
  • In a non stick skillet, cook pancetta in 1Tb olive oil until fully cooked and brown. When done, remove and reserve in a paper-towel lined bowl.
  • In the same pan, drain any excess oil that accumulated but save about 1Tb worth. Add zucchini, season lightly with salt and pepper and saute for2-3 minutes until zucchini begins to color but don't cook through. It should still be snappy. When done, reserve to separate plate.
  • Using a mandoline on setting #3, carefully slice potatoes on the longer side or use a sharp knife to slice thin slices.
  • *My tip: be careful when using a mandoline, make sure it is secure and sturdy and when slicing with dominant hand, have hand flat so fingers are not curled under, risking cutting.
  • Using a tart dish , drizzle olive oil and use a paper towel to smear oil all over the bottom and sides. Place potato slices all along the bottom and sides, slightly overlapping and making sure all seams are closed. Sprinkle with rosemary and drizzle of olive oil and bake in oven for 10 minutes.
  • Remove potato crust from oven and lower to 350 degrees. Pour in whisked eggs first and then add sliced zucchini, pancetta and cherry tomatoes. Top with shredded cheese and bake for 30 minutes.

Nutrition

Calories: 209kcal | Carbohydrates: 12g | Protein: 11g | Fat: 13g | Saturated Fat: 5g | Polyunsaturated Fat: 2g | Monounsaturated Fat: 5g | Trans Fat: 0.04g | Cholesterol: 155mg | Sodium: 257mg | Potassium: 450mg | Fiber: 2g | Sugar: 2g | Vitamin A: 397IU | Vitamin C: 20mg | Calcium: 143mg | Iron: 1mg

Chicken Puttanesca Sandwich

Nov 13, 2012 · Leave a Comment

If you are looking for a hearty flavorful sandwich, you will love this chicken puttanesca sandwich! A perfectly fried chicken cutlet uis layered with a chunky puttanesca sauce with all the favorites including capers, olives and salty anchovies and sandwiched in a rustic ciabatta bread.

Chicken Puttanesca Sandwich via LittleFerraroKitchen.com

The smell is intoxicating, It really is the slow simmering anchovies that give off such a gorgeous aroma...it's pretty addictive and the trick is to allow them to melt down into the heating olive oil, that way a light salty flavor touches every single bite of the chunky tomato sauce.

The chunky tomato sauce poured over a perfectly crispy chicken cutlet and with some softly toasted ciabatta bread-this was a sandwich made in sandwich heaven.

Method:

1) In a large skillet, drizzle some olive oil and add anchovies. Use a spatula to break the fish down and saute for a few minutes. Add chopped garlic, red pepper flakes and saute for another 2 minutes until lightly brown.

Chicken Puttanesca Sandwich via LittleFerraroKitchen.com

2) Add chopped tomatoes and olives and allow to cook until the tomatoes break down. About 3 minutes.

Chicken Puttanesca Sandwich via LittleFerraroKitchen.com

3) Add tomato paste and stir to incorporate. Add capers and cook for another 2 minutes for all the flavors to blend. Add chopped parsley and remain on low heat. Taste for seasoning.

Chicken Puttanesca Sandwich via LittleFerraroKitchen.com

4) To make the chicken cutlet, pound the chicken breast if you haven't already.

5) Dredge chicken breast in flour, then egg then breadcrumbs making sure everything is coated well.

Chicken Puttanesca Sandwich via LittleFerraroKitchen.com

6) In a separate heated skillet with olive oil, place chicken in and allow to cook until crispy and brown on one side, about 5-7 minutes. Turn over and cook other side. Reserve chicken to plate when done.

Chicken Puttanesca Sandwich via LittleFerraroKitchen.com

7) Slice ciabatta in half and grill to warm bread. If you have leftover garlic, rub garlic on the inside of grilled bread.

Chicken Puttanesca Sandwich via LittleFerraroKitchen.com

8) Assemble sandwich with chicken cutlet and topping with puttanesca sauce.

Chicken Puttanesca Sandwich via LittleFerraroKitchen.com

More sandwich and finger food inspiration

  • Plantain, Black Bean and Havarti Arepas
  • Four cheese pizza with Italian sausage, roasted peppers and grated Parmesan.
    Four Cheese Pizza with Sausage and Peppers
  • Mediterranean Fish Cakes full of bright lemon zest, garlic, leeks and spices and served along side smoky cumin tomato sauce and lemon horseradish to dip into.
    Mediterranean Fish Cakes with Lemon Horseradish and Cumin Tomato Sauce
  • A play on the traditional potato latkes, these salt and vinegar potato latkes have a hint of sourness from the vinegar and a healthy sprinkle of sea salt. Serve along side onion and chive sour cream for a fun play on latkes.
    Fun Latke Recipes
Print Recipe
5 from 3 votes

Chicken Puttanesca Sandwich

This hearty chicken puttanesca sandwich has a perfectly fried chicken cutlet layered with a chunky puttanesca sauce sandwiches with ciabatta.
Prep Time10 minutes mins
Cook Time20 minutes mins
Total Time30 minutes mins
Course: Dinner, Main
Cuisine: Italian
Keyword: chicken puttanesca, chicken puttanesca sandwich, italian chicken sandwich
Servings: 2 servings
Calories: 380kcal
Author: Samantha Ferraro

Ingredients

  • 1 skinless and boneless chicken breast pounded
  • ¼ cup flour
  • 1 egg beaten
  • ¼ cup bread crumbs
  • 2 tomato chopped
  • 2-3 Tb capers
  • ¼ cup olives chopped
  • 3 anchovy filets
  • 2 garlic clove chopped
  • 1 teaspoon red pepper flakes
  • 1 teaspoon tomato paste
  • Small bunch fresh parsley chopped
  • Olive oil for drizzling
  • Salt and pepper to taste
  • ¼ sliced Ciabatta bread
US Customary - Metric

Instructions

  • In a large skillet, drizzle some olive oil and add anchovies. Use a spatula to break the fish down and saute for a few minutes. Add chopped garlic, red pepper flakes and saute for another 2 minutes until lightly brown.
  • Add chopped tomatoes and olives and allow to cook until the tomatoes break down. About 3 minutes.
  • Add tomato paste and stir to incorporate. Add capers and cook for another 2 minutes for all the flavors to blend. Add chopped parsley and remain on low heat. Taste for seasoning.
  • To make the chicken cutlet, pound the chicken breast if you haven't already.
  • Dredge chicken breast in flour, then egg then breadcrumbs making sure everything is coated well.
  • In a separate heated skillet with olive oil, place chicken in and allow to cook until crispy and brown on one side, about 5-7 minutes. Turn over and cook other side. Reserve chicken to plate when done.
  • Slice ciabatta in half and grill to warm bread. If you have leftover garlic, rub garlic on the inside of grilled bread.
  • Assemble sandwich with chicken cutlet and topping with puttanesca sauce.

Nutrition

Calories: 380kcal | Carbohydrates: 51g | Protein: 25g | Fat: 8g | Saturated Fat: 2g | Polyunsaturated Fat: 1g | Monounsaturated Fat: 3g | Trans Fat: 0.01g | Cholesterol: 122mg | Sodium: 1011mg | Potassium: 388mg | Fiber: 3g | Sugar: 2g | Vitamin A: 574IU | Vitamin C: 3mg | Calcium: 73mg | Iron: 3mg

Sweet Intestines with Bloody Glass for Halloween

Oct 28, 2012 · 26 Comments

Puff pastry intestines are perfect for Halloween! Puff pastry is filled with a sweet mascarpone filling and rolled up to look like intestines and drizzled with a sweet bloody "raspberry jam" and finished with shards of edible glass.

I love Halloween. For one..it's my Birthday! I know...I just love it! I remember all the costumes I would dress up in as a kid. You know the standard "girl" costumes, like a witch, an angel, a 50's girl...my favorite was Wednesday Adams on my 11th Birthday.

And putting gory food together is even more fun. Last year I made Sweet Severed Fingers and friends had a hard time eating them from the looks. I knew I did good.

I felt like being a bit gory and fun this year, so for this Halloween and I found this idea to make "intestines". Cool huh? Of course I couldn't stop there! We had to make the intestines bloody and...well...perforated. I made some edible sugar glass that cut open the intestines with "blood" oozing out. Are you excited yet?

Edible Halloween Intestines

I stuffed the intestines with a sweet filling of cream cheese and mascapone with strawberries. If it was going to ooze out, might as well be sweet and delicious. I dripped  bloody raspberry preserves all over the intestines and then broke apart sugary glass to stab my intestines with. A sweet bloody mess is what this is. As it baked and puffed up, the intestines opened up and perforated, oozing out its sweet goodies and illustrating its gory and yummy insides.

How to Make Edible Intestines for Halloween

1) On a floured surface, roll the puff pastry sheets so it thins out a bit. Cut each sheet lengthwise into  4 strips.

2) Lay out parchment paper on a long flat and clean surface. A long counter or table will work. Then line the puff pastry strips at each end, forming 1 long strip.

3) Use a pastry brush to brush egg wash at each end and then use your fingers to press it down and seal it.

4) Using a mixer, mix together the cream cheese, mascapone, sugar and lemon zest and mix until well incorporated. Place mixture in ziplock bag making a "pastry bag" and snip off a tiny piece of the corner.

5) Pipe the cheese mixture all the way down the puff pastry.

* I found the mixture to be a tad too thin for what I wanted, so I placed it in the fridge for about 30 minutes. Next time I may not whip so long.

6) Sprinkle strawberries on top of cream mixture making sure to not overcrowd.

7) Next, seal the ends together and pinch with your fingers. Brush with egg wash to help seal. It some oozes out you can remove some filling.

8) Very gently and slowly and once your long puff pastry is all sealed, lift it up and move it into a parchment paper lined 9x13 baking sheet. This is a good time to have some help. Arrange as neatly or neatly as you like. Brush with egg wash.

9) Bake  in 350 degree oven for about 25 minutes until puff pastry begins to get golden brown.

10) To make the blood: Liquify 1 jar of raspberry preserves with a splash of water in a saucepan over medium heat. Stir with a whisk and allow to liquify. Strain through a sieve and add 1 drop of red food coloring. Mix well.

11) To make the glass: In a saucepan, dissolve sugar, water, corn syrup and cream of tartar. Stir with a whisk and use a candy thermometer to reach 315 degrees.

12) Pour sugar mixture into a foil lined baking sheet sprayed with non-stick spray and allow to cool to room temp, about an hour. Break apart "glass" using a mallet.

13) Drizzle bloody preserves over intestines and stick with glass.

More Holiday inspiration

  • Roast Turkey with Citrus, Herbs and Za'atar
  • Salmon Wellington
  • Gluten free hamantaschen recipe.
    Gluten Free Hamantaschen for Purim
  • Crispy potato latkes with different toppings, including salmon, creme fraiche and guacamole.
    Latke Bar with Toppings
Print Recipe
4.97 from 31 votes

Sweet Intestines with Bloody Glass for Halloween

Puff pastry intestines are perfect for Halloween! Puff pastry is filled with a sweet mascarpone filling, bloody "raspberry jam" and edible glass.
Prep Time30 minutes mins
Cook Time25 minutes mins
Chilling30 minutes mins
Total Time1 hour hr 25 minutes mins
Course: Dessert
Cuisine: American
Keyword: halloween puff pastry intestines, zombie intestines recipe
Servings: 16 servings
Calories: 472kcal
Author: Samantha Ferraro
Cost: $15

Ingredients

  • 2 sheets puff pastry defrosted
  • Flour for dusting
  • 1 egg + splash of water for egg wash whisked
  • 1 lb fresh strawberries cut into small pieces

Cheese Filling

  • 1 8 oz package cream cheese room temperature
  • 4 oz mascapone cheese
  • ¼ cup sugar
  • ½ lemon zested

Sweet Fake Blood

  • 1 jar raspberry preserves
  • 1 Tb water
  • 1 drop red food coloring

Sugar Glass

  • 2 cups water
  • 1 cup light corn syrup
  • 3 ½ cups sugar
  • ¼ teaspoon cream of tartar
US Customary - Metric

Instructions

  • On a floured surface, roll the puff pastry sheets so it thins out a bit. Cut each sheet lengthwise into 4 strips.
  • Lay out parchment paper on a long flat and clean surface. A long counter or table will work. Then line the puff pastry strips at each end, forming 1 long strip.
  • Use a pastry brush to brush egg wash at each end and then use your fingers to press it down and seal it.
  • Using a mixer, mix together the cream cheese, mascapone, sugar and lemon zest and mix until well incorporated. Place mixture in ziplock bag making a "pastry bag" and snip off a tiny piece of the corner.
  • Pipe the cheese mixture all the way down the puff pastry.
  • * I found the mixture to be a tad too thin for what I wanted, so I placed it in the fridge for about 30 minutes. Next time I may not whip so long.
  • Sprinkle strawberries on top of cream mixture making sure to not overcrowd.
  • Next, seal the ends together and pinch with your fingers. Brush with egg wash to help seal. It some oozes out you can remove some filling.
  • Very gently and slowly and once your long puff pastry is all sealed, lift it up and move it into a parchment paper lined 9x13 baking sheet. This is a good time to have some help. Arrange as neatly or neatly as you like. Brush with egg wash.
  • Bake in 350 degree oven for about 25 minutes until puff pastry begins to get golden brown.
  • To make the blood: Liquify ½ jar of raspberry preserves with a splash of water in a saucepan over medium heat. Stir with a whisk and allow to liquify. Strain through a sieve and a 1 drop of red food coloring. Mix well.e the
  • To make the glass: In a saucepan, dissolve sugar, water, corn syrup and cream of tartar. Stir with a whisk and use a candy thermometer to reach 315 degrees.
  • Pour sugar mixture into a foil lined baking sheet sprayed with non-stick spray and allow to cool to room temp, about an hour. Break apart "glass" using a mallet.
  • Drizzle bloody preserves over intestines and stick with glass.

Nutrition

Calories: 472kcal | Carbohydrates: 81g | Protein: 6g | Fat: 16g | Saturated Fat: 5g | Polyunsaturated Fat: 2g | Monounsaturated Fat: 7g | Trans Fat: 0.001g | Cholesterol: 19mg | Sodium: 212mg | Potassium: 124mg | Fiber: 1g | Sugar: 66g | Vitamin A: 127IU | Vitamin C: 18mg | Calcium: 80mg | Iron: 1mg

Nutella Banana Bread Pudding

Oct 24, 2012 · 14 Comments

One of the best bread pudding you will make! Croissants are filled with sweet banana and chocolate nutella and made into a decadent bread pudding.

Nutella Banana Bread Pudding via LittleFerraroKitchen.com

I have a thing for nutella, which is funny because I don't eat chocolate ever. But there is something about the hazelnut that does it for it. It's floral and aromatic, I would wear it if I could.

So I figured I would rekindle our love for nutella and Europe and make a very modern twist to nutella and croissants. I had a few over-ripe bananas left over and whipped up a quick bread pudding mixture.

Frangelico was key and zests of orange to cut some of the sugar. I also wanted an excuse to use these cute little blue Le Creuset pots.

Nutella and banana swirled together and dripped off the sides. The eggy mixture fluffed up the croissants and created a gorgeous crusty texture with a souffle like feel on the inside. Gosh...I need to make this again and again.

Ingredients

  • Croissants
  • Bananas 
  • Nutella
  • Eggs
  • Milk
  • Cinnamon
  • Nutmeg
  • Vanilla Extract
  • Almond Extract
  • Frangelico Liqueur
  • Orange

Instructions

  1. Cut croissants in half and spread each with nutella and banana. Close croissant and cut in thirds or quarters.
  2. In a bowl, whisk together eggs, milk, cinnamon, nutmeg, vanilla and almond extract, frangelico and orange zest.
  3. Place croissant quarters in baking dish and pour egg mixture over making sure all the bread is covered well. Cover with foil and allow to soak for 30 minutes.
  4. *I used individual baking dishes and put 3-4 quarters in each. You can also use a 9x13 baking dish and pour everything in.
  5. Bake in 350 degree oven for 25 minutes covered with foil. Remove foil and continue to bake for additional 10 minutes.
Nutella Banana Bread Pudding via LittleFerraroKitchen.com

More desserts

  • dust the blueberry peach clafoutis with powdered sugar and serve by the slice.
    Peach and Blueberry Clafoutis
  • Fruit Rose Tart with Rose Whipped Cream
  • Sweet Potato Pie with Coconut Whipped Cream
  • Plate of homemade pistachio baklava doused in a honey syrup.
    Turkish Pistachio Baklava with Orange Blossom Syrup
Print Recipe
5 from 19 votes

Nutella Banana Bread Pudding

One of the best bread pudding you will make! Croissants are filled with sweet banana and chocolate nutella and made into a decadent bread pudding.
Prep Time15 minutes mins
Cook Time35 minutes mins
Total Time50 minutes mins
Course: Brunch, Dessert
Cuisine: American, French
Keyword: banana bread pudding, croissant bread pudding, nutella bread pudding
Servings: 4 servings
Calories: 373kcal
Author: Samantha Ferraro

Equipment

  • Le Creuset Stoneware

Ingredients

  • 4 croissants
  • 2 over-ripe bananas mashed
  • Nutella ¼-1/2 cup enough to spread
  • 4 eggs
  • ½ cup milk
  • ½ teaspoon cinnamon
  • ½ teaspoon nutmeg
  • 1 teaspoon vanilla extract
  • 1 teaspoon almond extract
  • 1 teaspoon Frangellico hazlenut liquor
  • Zest of ½ orange
US Customary - Metric

Instructions

  • Cut croissants in half and spread each with nutella and banana. Close croissant and cut in thirds or quarters.
  • In a bowl, whisk together eggs, milk, cinnamon, nutmeg, vanilla and almond extract, frangelico and orange zest.
  • Place croissant quarters in baking dish and pour egg mixture over making sure all the bread is covered well. Cover with foil and allow to soak for 30 minutes.
  • *I used individual baking dishes and put 3-4 quarters in each. You can also use a 9x13 baking dish and pour everything in.
  • Bake in 350 degree oven for 25 minutes covered with foil. Remove foil and continue to bake for additional 10 minutes.

Nutrition

Calories: 373kcal | Carbohydrates: 42g | Protein: 12g | Fat: 17g | Saturated Fat: 9g | Polyunsaturated Fat: 2g | Monounsaturated Fat: 5g | Trans Fat: 0.02g | Cholesterol: 206mg | Sodium: 294mg | Potassium: 390mg | Fiber: 3g | Sugar: 16g | Vitamin A: 750IU | Vitamin C: 5mg | Calcium: 89mg | Iron: 2mg

My 1st Challah-Pumpkin Challah

Oct 18, 2012 · 3 Comments

A fall twist on challah, this pumpkin challah is flavored with warm spices of cinnamon and nutmeg.

I made my first challah last week. I am probably the only Jewish girl out there that has never made a challah from start to finish...I can admit that and finally cross it off my bucket list. Actually, when I was younger, I went to Yeshiva (Jewish school) and every Friday before Shabbos the teacher would give us a small dough to work with. I remember making it into a simple 3 strand braid and then bringing the dough home to cook for Friday night. Of course that was the end of my baking lesson and for years I would just go to the local Jewish deli and buy a challah. Unfortunately, living in my part of Southern California, classic Jewish delis are sparse and hard to find unless you live in L.A. It's these time that I really miss New York.

I've heard that making challah is a therapeutic experience and I couldn't wait to get my hands covered in dough and knead some love into baking. Everyone has pumpkin on the brain and I have been stalking Tori Aveys's Pumpkin challah for some time now. It has all the flavors of fall; pumpkin and nutmeg, cinnamon and honey...I couldn't resist.

I read through her recipe over and over again, making sure I understood everything. It is a process...a LONG and beautiful process. And for the first time making it, I think I can pat myself on the back a bit. You allow the dough to rise twice, each for an hour and then after you braid you allow it to rise again for at least 30 minutes.

I also struggled with the questions of how many strands I should braid. Usually for a first time challah, you could do a classic 3-strand braid. Nice and simple and almost everyone knows how to braid 3-strands, but I am an over-achiever when it comes to cooking and I cut my dough into quarters. A 4-strand bread is really quite easy. You have 4 strands, secure at one end and just do a "over-under-over" kinda thing. I'll explain that a bit later.

The challah came out perfect. It was golden and fluffed up in my oven The smells of cinnamon and nutmeg perfumed the whole house and I took every sense of smell and feeling of Holiday baking into my soul. The beautiful thing abo0ut this challah, was that I was able to break bread and give some away to someone that has never had challah before.

I also want to warn you that thi8s batch makes A LOT of dough. I only used half the dough to make this large challah braid and put the other half in the freezer in hopes of making mini challahs for Thanksgiving. However, I am hearing that freezing challah dough isn't always the bet option..so watch out for my next experiment before Thanksgiving.

Method:

1) In a large mixing bowl, dissolve 2 packets of yeast  and 1 Tb sugar into  ½ cup warm water, Wait about 10 minutes and the yeast should look foamy. If it doesn't, your yeast may have expired.

2) Once yeast is activated, add  other ½ cup warm water and remaining sugar and brown sugar, egg and yolks, honey, oil and spices. Whisk everything together until well incorporated. Add pumpkin puree and mix to incorporate.

3) Add flour to the pumpkin mixture by the ½ cupfuls at a time. Gently mix in with a large spoon (Yes, this was all done by hand!) When mixture begins to get too thick to stir, take out of bowl and knead. This happened about half-way through. Continue to add flour until dough is not sticky. I used 7 cups of flour.

4 Wash out the bowl well and coat it with canola oil. Add dough back in and turn over so dough is covered with oil. Meanwhile, bring a small pot of water to a boil. You will use this to help rise the dough.

5) Cover the dough with a damp towel and place it over the bowl and dough. Place bowl in the middle rack of your oven and the boiling pot of water (lid off) underneath. This crates a warm and moist environment and helps the dough rise Close oven but don't turn on and allow to rise for 1 hr.

6) After the hour, take bowl out and punch the dough down a few times. This was the fun part! Then place it back in the oven for 1 more hour for a second rise.

7) After the second rise, take the bowl out of the oven. Flour a clean surface and knead the dough a few times. Then cut the dough in half. Each half will make 1 large challah.

8) For a 3 strand challah, cut your half into thirds. For a 4 strand challah, cut the dough into quarters. (At this point I froze the other half, but I don't know the outcome of defrosting yet).

9)  To braid challah, take one of the dough parts being used for a strand and roll it out sightly with a rolling pin.

10) Then using your hands roll the further end of the dough towards you, creating a strand. Continue to roll on a floured surface until desired length. Use your hands to create length at the ends.

11) Once all the strands are created, secure them loosely at one end.

12) For a 4-strand braid, remember "Over-Under"Over". Take the strand furthest to the right and go over, then under then over the strands. Repeat with the new strand that's furthest to the right. After braiding, tuck the ends under. Place the challah on a baking sheet lined with parchment paper.

13) P re-heat oven to 350 degrees and brush the challah with egg wash. Tent the challah losely with foil and allow to rise for another 30 minutes.

14) Bake challah for a total of 40 minutes. But first set timer for 20 minutes then turn challah around in oven and bake for the other 20 minutes for even baking. Watch the challah for coloring and desired browning.

*Note: After the 1st 20 minutes, I brushed the challah with additional egg wash in the areas that needed browning.

15) When challah is done is should be golden brown and not doughy in the center.

*Future goals: Make strands neater and perfect braiding technique.

Print Recipe
5 from 7 votes

Pumpkin Challah

A fall twist on challah, this pumpkin challah is flavored with warm spices of cinnamon and nutmeg.
Prep Time20 minutes mins
Cook Time40 minutes mins
Proofing2 hours hrs 30 minutes mins
Total Time3 hours hrs 30 minutes mins
Course: Breakfast, Brunch
Cuisine: Jewish
Keyword: pumpkin challah
Servings: 16 servings
Calories: 303kcal
Author: Samantha Ferraro

Ingredients

  • 2 packages yeast
  • 1 cup warm water divided
  • 3 tablespoon white sugar
  • 6 egg yolks + 1 whole egg
  • ¼ cup honey
  • 2 tablespoon canola oil
  • 2 teaspoon salt
  • 2 teaspoon cinnamon
  • ¾ teaspoon nutmeg
  • ½ teaspoon allspice
  • ½ cup brown sugar
  • 2 cups pumpkin puree 1 can size
  • 7 cups flour + more for dusting
  • 1 egg + splash of water whisked for egg wash
US Customary - Metric

Instructions

  • In a large mixing bowl, dissolve 2 packets of yeast and 1 Tb sugar into ½ cup warm water, Wait about 10 minutes and the yeast should look foamy. If it doesn't, your yeast may have expired.
  • Once yeast is activated, add other ½ cup warm water and remaining sugar, eggs and yolks, honey, oil and spices. Whisk everythi8ng together until well incorporated. Add pumpkin puree and mix to incorporate.
  • Add flour to the pumpkin mixture by the ½ cupfuls at a time. Gently mix in with a large spoon (Yes, this was all done by hand!) When mixture begins to get too thick to stir, take out of bowl and knead. This happened about half-way through. Continue to add flour until dough is not sticky. I used 7 cups of flour.
  • Wash out the bowl well and coat it with canola oil. Add dough back in and turn over so dough is covered with oil. Meanwhile, bring a small pot of water to a boil. You will use this to help rise the dough.
  • Cover the dough with a damp towel and place it over the bowl and dough. Place bowl in the middle rack of your oven and the boiling pot of water (lid off) underneath. This crates a warm and moist environment and helps the dough rise Close oven but don't turn on and allow to rise for 1 hr.
  • After the hour, take bowl out and punch the dough down a few times. This was the fun part! Then place it back in the oven for 1 more hour for a second rise.
  • After the second rise, take the bowl out of the oven. Flour a clean surface and knead the dough a few times. Then cut the dough in half. Each half will make 1 large challah.
  • For a 3 strand challah, cut your half into thirds. For a 4 strand challah, cut the dough into quaters. (At this point I froze the other half, but I don't know the outcome of defrosting yet).
  • To brad challah, take one of the dough parts being used for a strand and roll it out sightlty with a rolling pin.
  • Then using your hands roll the further end of the dough towards you, creating a strand. Continue to roll on a floured surface until desired length. Use your hands to create length at the ends.
  • Once all the strands are created, secure them lightly at one end.
  • For a 4-strand braid, remember "Over-Under"Over". Take the strand furthest to the right and go over, then under then over the strands. Repeat with the new strand that's furthest to the right. After braiding, tuck the ends under. Place the challah on a baking sheet lined with parchment paper.
  • re-heat oven to 350 degrees and brush the challah with egg wash. Tent the challah losely with foil and allow to rise for another 30 minutes.
  • Bake challah for a total of 40 minutes. But first set timer for 20 minutes then turn challah around in oven and bake for the other 20 minutes for even baking. Watch the challah for coloring and desired browning.
  • *Note: After the 1st 20 minutes, I brushed the challah with additional egg wash in the areas that needed browning.
  • When challah is done is should be golden brown and not doughy in the center.

Nutrition

Calories: 303kcal | Carbohydrates: 56g | Protein: 9g | Fat: 5g | Saturated Fat: 1g | Polyunsaturated Fat: 1g | Monounsaturated Fat: 2g | Trans Fat: 0.01g | Cholesterol: 72mg | Sodium: 324mg | Potassium: 160mg | Fiber: 2g | Sugar: 15g | Vitamin A: 4872IU | Vitamin C: 1mg | Calcium: 37mg | Iron: 1mg

Chile Relleno with Ranchero Sauce.

Sep 16, 2012 · 30 Comments

A Mexican favorite, chile relleno are stuffed poblano peppers with cheese and fried with a light batter. The chile rellenos are served with a flavorful and savory ranchero sauce.

Chile Relleno with Ranchero Sauce via LittleFerraroKitchen.com

I promised Joe I would make him his favorite Mexican dish ever...chile relleno. It's rare I let the poor guy order it when we go out, so I thought a treat for this party would be fun. Of course I did my research and put several things together as well as my own twist. The boys that work in the kitchen at the restaurant Joe works at always whip up some Mexican grub and they happened to make some ranchero sauce. Joe brought home a sample and I tasted my way through its ingredients. It was deep red with a primary tomato base and had chunks of green pepper and onion. I knew where I was going with this.

Now I can't offer you a Mexican classic without first embarrassing myself and showing you a picture of my first trip to Mexico. About 3 years ago Joe and I flew down to Cancun and visited Chichen Itza as well as I jumping onto my very first horse. His name was "Singer" and we galloped through the Mexican waters together.It was a moment I will never forget. Don't laugh.

Chile Relleno with Ranchero Sauce via LittleFerraroKitchen.com

Method:

1) Make ranchero sauce first. In a large and deep skillet, saute onion, bell pepper and jalapeno in olive oil until it begins to break down. About 10 minutes.

Chile Relleno with Ranchero Sauce via LittleFerraroKitchen.com

2) Add garlic and spices and cook for another 2-3 minutes until garlic begins to brown.

Chile Relleno with Ranchero Sauce via LittleFerraroKitchen.com

3) Add tomatoes with its juice and bay leaf and bring to a boil. Then reduce and cover on a simmer while you prepare the chile. Remove bay leaf before serving.

*Note: I made this earlier in the day and saved it for dinner. I thought the consistency and flavors pulled together more during those few hours of "sitting". So if you have the time to make this ahead, please do.

4) Make chile: Take the egg whites and using a stand mixer, whisk until stiff peaks form. Lightly whisk together the yolks in a separate bowl and fold in yolks with egg whites until light yellow. Set aside.

Chile Relleno with Ranchero Sauce via LittleFerraroKitchen.com

5) Place chiles on a foil lined baking sheet and roast in oven at 450 degrees for about 20 minutes or until all sides are blistered. Meanwhile, heat a large pan or cast iron with ½ inch canola or vegetable oil.

Chile Relleno with Ranchero Sauce via LittleFerraroKitchen.com

6) When chiles are done, remove and wrap with plastic wrap or place in plastic bag and remove outer charred skin. Use a small knife to cut an opening on one side of chile and discard seeds. Fill with crumbled queso fresco and secure with a toothpick.

Chile Relleno with Ranchero Sauce via LittleFerraroKitchen.com

6)Dredge the chile in flour and then in the egg mixture. Gently drop coated chile in heated oil and fry until all sides are golden brown. About 1-2 minutes per side.

Chile Relleno with Ranchero Sauce via LittleFerraroKitchen.com

*Note: I had some minor difficulty when I wanted to coat with the egg mixture. I quickly found out that this was due to the intense heat wave we've been having (try 100+) and because of that my egg mixture was quickly melting before my eyes. Make sure to evenly coat the pepper and if you need to use an extra spoon to coat, that will help too.

7) Serve chile atop of ranchero sauce and garnish with fresh cilantro and queso fresco.

 Looking for more Mexican recipe inspiration? Try my slow cooker chicken chili verde recipe!

Chile Relleno with Ranchero Sauce via LittleFerraroKitchen.com
Print Recipe
5 from 31 votes

Chile Relleno with Ranchero Sauce

A Mexican favorite, chile relleno is stuffed poblano peppers with cheese and fried with a light batter. The chile rellenos are served with a flavorful and savory ranchero sauce.
Course: Dinner, Main
Cuisine: Mexican
Servings: 4 servings
Calories: 370kcal
Author: Samantha Ferraro

Ingredients

Chile Relleno

  • 4 pasilla chile
  • 8 oz queso fresco plus more for garnish
  • ½ c flour
  • 4 eggs separated
  • Canola oil for frying

Ranchero Sauce

  • 1 32 oz can chopped tomatoes
  • 1 green bell pepper chopped
  • ½ onion chopped
  • 1 jalapeno diced (with or without seeds)
  • 2-3 garlic cloves chopped
  • ½ teaspoon cumin
  • ½ teaspoon dried oregano
  • ½ teaspoon paprika
  • Salt and pepper to taste
  • Olive oil for drizzling
US Customary - Metric

Instructions

  • Make ranchero sauce first. In a large and deep skillet, saute onion, bell pepper and jalapeno in olive oil until it begins to break down. About 10 minutes.
  • Add garlic and spices and cook for another 2-3 minutes until garlic begins to brown.
  • Add tomatoes with its juice and bay leaf and bring to a boil. Then reduce and cover on a simmer while you prepare the chile. Remove bay leaf before serving.
  • Make chile: Take the egg whites and using a stand mixer, whisk until stiff peaks form. Lightly whisk together the yolks in a separate bowl and fold in yolks with egg whites until light yellow. Set aside.
  • Place chiles on a foil lined baking sheet and roast in oven at 450 degrees for about 20 minutes or until all sides are blistered. Meanwhile, heat a large pan or cast iron with ½ inch canola or vegetable oil.
  • When chiles are done, remove and wrap with plastic wrap or place in plastic bag and remove outer charred skin. Use a small knife to cut an opening on one side of chile and discard seeds. Fill with crumbled queso fresco and secure with a toothpick.
  • Dredge the chile in flour and then in the egg mixture. Gently drop coated chile in heated oil and fry until all sides are golden brown. About 1-2 minutes per side.
  • Serve chile atop of ranchero sauce and garnish with fresh cilantro and queso fresco.

Nutrition

Calories: 370kcal | Carbohydrates: 31g | Protein: 21g | Fat: 19g | Saturated Fat: 9g | Polyunsaturated Fat: 2g | Monounsaturated Fat: 5g | Trans Fat: 0.5g | Cholesterol: 203mg | Sodium: 832mg | Potassium: 846mg | Fiber: 6g | Sugar: 9g | Vitamin A: 3750IU | Vitamin C: 52mg | Calcium: 443mg | Iron: 5mg

Linguini Bolognese with Wild Boar

Sep 11, 2012 · 1 Comment

A rich bolognese with wild boar and simmered for hours until rich, thick and flavorful. Add bolognese to linguini and shaved Parmesan.

Linguini with bolognese came to mind while I was preparing for our meal planning. We're trying to use what we have on hand and work with that. Ground wild boar, half box of linguini and speck were stocked and a twist to the tradition sounded fun to do.

So in this venture, I wanted to make a sauce that clung to every noodle for its dear life. I wanted the tomatoes and meat to blend together and cook for hours and taste like one cohesive bite. It's not fair to say that one recipe inspired me or "adapted" because I used a combination of recipes and techniques from my research (Chowhound message boards, for example) and used what I had on hand and what came forth was incredible!

A thick and luscious tomato-meat ragu. The meat was wild boar which tastes different than beef...hard to explain in words, noticeable but not overwhelming.

How to Make Bolognese with Wild Boar

1) In a food processor, pure onion, celery and carrot to a coarse puree.

2) In a large dutch oven coated with olive oil on medium heat, saute vegetable pure for about 5 minutes until softened. Add chopped garlic an d red pepper flakes. Saute until garlic is lightly brown.

3) Move the mixture to the side of the pot and make room in the middle. Drizzle more oil if needed. Add speck (or pancetta) and cook until lightly brown, turning to cook.

4) Move speck to side and make room in middle and add ground boar. Season with salt and pepper. Use a spatula to break up the meat as it begins to cook. Allow meat to brown for about 5-7 minutes, breaking up and tossing as it cooks. Add 1tsp oregano and thyme.

5) Slowly add ¾ cup whole milk into the meat mixture. Allow milk to evaporate. Use spatula to mix meat so milk doesn't burn. Add 1 cup red wine and allow alcohol to cook off, reducing the wine. Toss mixture together in pot. Add tomato paste and mix well.

6) Add crushed tomatoes and stir everything to combine. Cover and allow to cook on a low simmer for 2 hours.

7) Toss with cooked linguini and top with shavings of Parmigiano-Reggiano.

More great pasta recipes:

Easy Halloumi Pasta with Cherry Tomatoes

Homemade Meatballs with Sunday Gravy

Penne Alla Vodka with Parmigiano and Fresh Oregano (Vodka Pink Sauce)

Print Recipe
5 from 5 votes

Linguini Bolognese with Wild Boar

A rich bolognese with wild boar and simmered for hours until rich, thick and flavorful. Add bolognese to linguini and shaved Parmesan.
Prep Time10 minutes mins
Cook Time2 hours hrs
Total Time2 hours hrs 10 minutes mins
Course: Dinner, Main
Cuisine: Italian
Keyword: bolognese with wild boar
Servings: 6 servings
Calories: 458kcal
Author: Samantha Ferraro

Ingredients

  • 1 lb chopped Wild Boar
  • 6 oz Speck roughly chopped
  • 1 celery stalk roughly chopped
  • 1-2 carrots peeled and chopped
  • ½ red onion chopped
  • 2 garlic cloves chopped
  • 1 32 oz can San Marzano crushed tomatoes
  • ½ cup whole milk
  • 1 cup red wine
  • 1 teaspoon red pepper flakes
  • 1 teaspoon dried oregano
  • Few sprigs fresh thyme
  • Salt and pepper to taste
  • Olive oil for drizzling
  • Parmigiano-Reggiano shaved for garnish
  • ½ lb linguini
US Customary - Metric

Instructions

  • In a food processor, pure onion, celery and carrot to a coarse puree.
  • In a large dutch oven coated with olive oil on medium heat, saute vegetable pure for about 5 minutes until softened. Add chopped garlic an d red pepper flakes. Saute until garlic is lightly brown.
  • Move the mixture to the side of the pot and make room in the middle. Drizzle more oil if needed. Add speck (or pancetta) and cook until lightly brown, turning to cook.
  • Move speck to side and make room in middle and add ground boar. Season with salt and pepper. Use a spatula to break up the meat as it begins to cook. Allow meat to brown for about 5-7 minutes, breaking up and tossing as it cooks. Add 1tsp oregano and thyme.
  • Slowly add ¾ cup whole milk into the meat mixture. Allow milk to evaporate. Use spatula to mix meat so milk doesn't burn. Add 1 cup red wine and allow alcohol to cook off, reducing the wine. Toss mixture together in pot. Add tomato paste and mix well.
  • Add crushed tomatoes and stir everything to combine. Cover and allow to cook on a low simmer for 2 hours.
  • Toss with cooked linguini and top with shavings of Parmigiano-Reggiano.

Nutrition

Calories: 458kcal | Carbohydrates: 45g | Protein: 28g | Fat: 16g | Saturated Fat: 5g | Polyunsaturated Fat: 3g | Monounsaturated Fat: 6g | Trans Fat: 0.04g | Cholesterol: 21mg | Sodium: 419mg | Potassium: 741mg | Fiber: 5g | Sugar: 10g | Vitamin A: 2186IU | Vitamin C: 16mg | Calcium: 114mg | Iron: 3mg


Zucchini Gratin and Menu Planning

Aug 24, 2012 · 2 Comments

Well here we are, the last Friday of my summer. Geez did this go by fast! I have so many things I need to figure out. Joe mentioned "menu planning" yesterday and I thought that was such a fabulous idea. We have a bad habit of going to the store almost every day and making whatever the Food Network tells us to, our freezer is either overflowing or something goes bad.

So there I go shuffling through all the frozen protein we have stocked away in the freezer. I figured we should make a menu of things we have on hand, obviously and go from there. Well..it barely made a dent.

Here's what I came up with for the week:

1) Yogurt marinated chicken with curry and garlic and side of arugula salad (that neighbors just gave us...perfect!)

2) Pasta with tomatoes and scallops.

3) Grilled Pizza with Zucchini. Can you believe we have more zucchini! I'm thinking of ways to use them up!

4) Veal Picatta with sauteed zucchini.

5) Crock Pot Mexi-Style Chicken: This will end up on Monday, Joe will be working all day and I will be at school...so I am dusting off the crock pot!

6) Leftover chicken: make into enchiladas or bowls, etc.

So this is as far as I've gotten. How does this look? And I barely dented our fridge let alone our cubbards! And now that school is starting I have a LOT more planning to do. New schedules, school lunches, workouts and of course blogging.

Now let's get back to why we're all here....food! I have probably just made something perfectly healthy into something so incredibly indulgent. And I'm OK with that. Zucchini gratin is what's going on today, the last of that huge 4lb zucchini I was talking about earlier.

The funny thing is I was going to give a batch to my wonderful neighbors who gifted us with the gourd, but being my klutzy self..I left the leftovers out overnight and had to chuck it in the garbage. I shed a tear.

However, the few servings I did manage to serve up for dinner were succulent. Rich but not heavy and earthy from the zucchini. I liked the combined textures of the crunchy topping with the gooey cheese. I will be making this again.

Method:

1) Pre-heat oven to 400 degrees. In a large saute pan, melt butter and onions over low heat for about 20 minutes until tender but not browned. Add zucchini and cook, covered for another 10 minutes or so, until tender. Add salt, pepper, nutmeg and cook uncovered for a few more minutes to evaporate liquid.

2) Add flour and stir to coat. Add hot milk and cook over low heat for a few minutes until it gets a little thicker. Pour mixture into a baking dish.

3) In a separate bowl, combine bread crumbs and Gruyere cheese and sprinkle on top of zucchini mixture. Top with small dots of butter. Bake for 20 minutes or until brown and bubbly.

Print Recipe
5 from 3 votes

Zucchini Gratin and Menu Planning

Recipe inspired by Ina Garten
Servings: 4 servings
Calories: 367kcal
Author: Samantha Ferraro

Ingredients

  • 6 tablespoons ¾ stick unsalted butter, + extra for topping
  • ½ onion sliced
  • 2 pounds zucchini sliced thin
  • ¼ teaspoon ground nutmeg
  • 2 Tb flour
  • 1 cup hot milk
  • ½ cup fresh bread crumbs
  • ½ cup grated Gruyere
  • Salt and pepper to taste
US Customary - Metric

Instructions

  • Pre-heat oven to 400 degrees. In a large saute pan, melt butter and onions over low heat for about 20 minutes until tender but not browned. Add zucchini and cook, covered for another 10 minutes or so, until tender. Add salt, pepper, nutmeg and cook uncovered for a few more minutes to evaporate liquid.
  • Add flour and stir to coat. Add hot milk and cook over low heat for a few minutes until it gets a little thicker. Pour mixture into a baking dish.
  • In a separate bowl, combine bread crumbs and Gruyere cheese and sprinkle on top of zucchini mixture. Top with small dots of butter. Bake for 20 minutes or until brown and bubbly.

Nutrition

Calories: 367kcal | Carbohydrates: 24g | Protein: 12g | Fat: 26g | Saturated Fat: 15g | Polyunsaturated Fat: 1g | Monounsaturated Fat: 7g | Trans Fat: 1g | Cholesterol: 71mg | Sodium: 261mg | Potassium: 753mg | Fiber: 3g | Sugar: 10g | Vitamin A: 1234IU | Vitamin C: 42mg | Calcium: 312mg | Iron: 2mg

Fried Zucchini Pancakes

Aug 20, 2012 · 9 Comments

When you need to use up your zucchini harvest, these simply fried zucchini pancakes with herby oregano are fried to perfectly crisp and served with cool and creamy Crème fraîche.

Fried Zucchini Pancakes with Creme Fraiche and Oregano

This is also pretty easy to whip up. Everything is common staples in a kitchen and the use of a cast iron creates the perfect crunch.

Fried Zucchini Pancakes with Creme Fraiche and Oregano


Method:  

1) Using the shredding blade on your food processor (or just grate), grate zucchini and red onion and place in bowl. Sprinkle with some kosher salt and allot to sit for a few minutes.

Fried Zucchini Pancakes with Creme Fraiche and Oregano

2) Meanwhile, get your skillet hot and pour about ¼in canola or vegetable oil in.

3) Using a kitchen towel to place all the zucchini in and squeeze out the extra water. The salt will help pull the water out. Squeeze as much as you can to get it super dry.

4) Put shredded zucchini and onion back in bowl and add egg, flour, baking powder, salt and pepper, fresh oregano. Toss to combine.

Fried Zucchini Pancakes with Creme Fraiche and Oregano

5) Use a table spoon to drop even sized pancakes in the hot oil. You know they are hot when it sizzles. I test it out with a small piece of zucchini first.

Fried Zucchini Pancakes with Creme Fraiche and Oregano

6) Fry on one side until golden brown and then carefully flip over to fry other side. Reserve to a paper lined plate and sprinkle with kosher salt.

7) Top with a dollop of Crème fraîche and a small sprig of oregano.

  • Zucchini
  • Red Onion
  • Egg
  • Flour
  • Baking Soda
  • Fresh Oregano
  • Salt and Pepper 
  • Canola Oil
  • Crème Fraîche 

  1. Using the shredding blade on your food processor (or just grate), grate zucchini and red onion and place in bowl. Sprinkle with some kosher salt and allot to sit for a few minutes.
  2. Meanwhile, get your skillet hot and pour about ¼in canola or vegetable oil in.
  3. Using a kitchen towel to place all the zucchini in and squeeze out the extra water. The salt will help pull the water out. Squeeze as much as you can to get ut super dry.
  4. Put shredded zucchini and onion back in bowl and add egg, flour, baking powder, salt and pepper, fresh oregano. Toss to combine.
  5. Use a table spoon to drop even sized pancakes in the hot oil. You know they are hot when it sizzles. I test it out with a small piece of zucchini first.
  6. Fry on one side until golden brown and then carefully flip over to fry other side. Reserve to a paper lined plate and sprinkle with kosher salt.
  7. Top with a dollop of Crème fraîche and a small sprig of oregano.

More Zucchini inspiration

  • Cheesy yellow squash pie with ricotta and Parmesan.
    Sephardic Zucchini Casserole
  • Savory zucchini galette with fresh thyme.
    Savory Zucchini Galette
  • Zucchini Baba Ghanoush
    Smoky Zucchini Baba Ghanoush
  • Roasted Vegetable and Romesco Crostini
Print Recipe
5 from 11 votes

Fried Zucchini Pancakes

These simply fried zucchini pancakes with herby oregano are fried to perfectly crisp and served with cool and creamy Crème fraîche.
Prep Time10 minutes mins
Cook Time15 minutes mins
Total Time25 minutes mins
Course: Side Dish
Cuisine: American
Keyword: zucchini pancakes
Servings: 4 servings
Calories: 64kcal
Author: Samantha Ferraro

Ingredients

  • 2-3 zucchini ends cut off
  • ¼ red onion
  • 1 egg
  • ¼ c flour
  • ¼ teaspoon baking soda
  • few sprigs fresh oregano
  • Salt and pepper to taste
  • Canola oil for frying
  • Crème fraîche for serving
US Customary - Metric

Instructions

  • Using the shredding blade on your food processor (or just grate), grate zucchini and red onion and place in bowl. Sprinkle with some kosher salt and allot to sit for a few minutes.
  • Meanwhile, get your skillet hot and pour about ¼in canola or vegetable oil in.
  • Using a kitchen towel to place all the zucchini in and squeeze out the extra water. The salt will help pull the water out. Squeeze as much as you can to get ut super dry.
  • Put shredded zucchini and onion back in bowl and add egg, flour, baking powder, salt and pepper, fresh oregano. Toss to combine.
  • Use a table spoon to drop even sized pancakes in the hot oil. You know they are hot when it sizzles. I test it out with a small piece of zucchini first.
  • Fry on one side until golden brown and then carefully flip over to fry other side. Reserve to a paper lined plate and sprinkle with kosher salt.
  • Top with a dollop of Crème fraîche and a small sprig of oregano.

Nutrition

Calories: 64kcal | Carbohydrates: 10g | Protein: 3g | Fat: 1g | Saturated Fat: 0.4g | Polyunsaturated Fat: 0.3g | Monounsaturated Fat: 0.4g | Trans Fat: 0.01g | Cholesterol: 41mg | Sodium: 92mg | Potassium: 289mg | Fiber: 1g | Sugar: 3g | Vitamin A: 256IU | Vitamin C: 18mg | Calcium: 25mg | Iron: 1mg

Rice Pudding Supreme

Jul 29, 2012 · 2 Comments

Rice pudding. But this isn't any rice pudding. This IS the BEST rice pudding you will EVER make and EVER eat.

A true labor of love, this pudding took me well over 2 hours to execute and I had to conquer the task since Joe has been begging me to for months.....no years! See, this rice pudding is special. This "Rice Pudding Supreme" is Joe's mothers, mother's retro recipe...dating back nearly 60 years. It is a true gem! I was handed the honor of Joe's moms "recipe box" with all kinds of neat retro recipes- "chicken evergreen", "jello supreme" and this favorite.

I have to admit that I was slightly embarrassed at the checkout counter buying "canned fruit cocktail"..since you wont usually see that on this blog...but that's what is so special about this recipe and what it calls for. And trust me...it is amazzzing! It did bring back some memories too. I always used to pick out and eat the cherries as a kid. You know you did too.

Method:

1) In a medium pot, add rice and 2 ½ c of water. Leave on low-medium heat and stir constantly. Add pinch of salt. Do not cover or leave alone for a long period of time. Stirring is what creates the starchy consistency. This took 30 minutes.

2) After the rice has soaked up all the water, add in the 1 quart of milk. Now this is where I got scared because that's is a lot of milk! Just continue to stir on medium heat and the rice will soak up all the milk and become super creamy. This part took 1 hr.

3) After the rice has soaked up all the milk and has become creamy, take it off the heat and place in bowl or Tupperware and chill in fridge for a few hours. (I sped this up and put in  the freezer for about an hour).

4) In a mixing bowl or large stand mixer, pour in the heavy whipping cream and begin to whip  starting on low speed and increasing until soft peaks form.

5) Once the rice is chilled, take it out of the fridge and pour it into a large bowl. Fold in canned fruit cocktail, raisins,  ¾ cup sugar, vanilla and cinnamon.

6) Now fold in the whipping cream carefully. Folding from the middle and around. Be gentle and keep it light and fluffy.

Oh so creamy and decadent. Light and fluffy. Just enough sweetness and a bite of texture from the raisins and fruit.

Don't you love these retro-recipes?

Thank you Joe's Grandma!

More Classic recipes

  • Caramel eclairs with caramel sauce on top.
    Salted Caramel Eclairs
  • Classic Eggplant Parmesan recipe is a favorite comfort food. Peeled and fried eggplant is generously flavored with fresh herbs and Parmesan cheese that is then baked with layers of marinara and mozzarella.
    Classic Eggplant Parmesan
  • Blueberry Thyme Pie in a Jar
  • Lobster thermidor recipe with Gruyere cheese.
    Classic Lobster Thermidor Recipe
Print Recipe
5 from 3 votes

Rice Pudding Supreme

Rice pudding supreme is a retro recipe made with minute rice, whipped cream and classic canned fruit cocktail.
Servings: 6 servings
Calories: 554kcal
Author: Samantha Ferraro

Ingredients

  • 1 cup Uncle Bens white rice
  • 1 quart whole milk
  • 1 pint heavy whipping cream
  • ¾ c sugar
  • 1 can "fruit cocktail" drained
  • ½ c raisins
  • 1 teaspoon vanilla
  • ½ teaspoon cinnamon
US Customary - Metric

Instructions

  • In a medium pot, add rice and 2 ½ c of water. Leave on low-medium heat and stir constantly. Add pinch of salt. Do not cover or leave alone for a long period of time. Stirring is what creates the starchy consistency. This took 30 minutes.
  • After the rice has soaked up all the water, add in the 1 quart of milk. Now this is where I got scared because that's is a lot of milk! Just continue to stir on medium heat and the rice will soak up all the milk and become super creamy. This part took 1 hr.
  • After the rice has soaked up all the milk and has become creamy, take it off the heat and place in bowl or Tupperware and chill in fridge for a few hours. (I sped this up and put in the freezer for about an hour).
  • In a mixing bowl or large stand mixer, pour in the heavy whipping cream and begin to whip starting on low speed and increasing until soft peaks form.
  • Once the rice is chilled, take it out of the fridge and pour it into a large bowl. Fold in canned fruit cocktail, raisins, ¾ cup sugar, vanilla and cinnamon.
  • Now fold in the whipping cream carefully. Folding from the middle and around. Be gentle and keep it light and fluffy.

Nutrition

Calories: 554kcal | Carbohydrates: 57g | Protein: 9g | Fat: 34g | Saturated Fat: 21g | Polyunsaturated Fat: 2g | Monounsaturated Fat: 8g | Trans Fat: 0.002g | Cholesterol: 108mg | Sodium: 90mg | Potassium: 417mg | Fiber: 1g | Sugar: 35g | Vitamin A: 1416IU | Vitamin C: 1mg | Calcium: 255mg | Iron: 1mg

Creamy Penne with Zucchini

Jul 6, 2012 · 3 Comments

We have the nicest neighbors. They gave us an abundance of fresh produce out of their garden yesterday. The tomatoes will be coming up next week so today I am showcasing these little green cuties.

Since today is Friday, I would usually be showing off my latest Julia Child project. Of course July 4th took the best of me and I had enough sugar and meat for the next year.

So, I am sorry Julia. I hope you forgive me. I will honor you next week with butter and heavy cream, I'm sure. Instead, today we have a creamy and healthy pasta dish with shaved home-grown zucchinis. Simple, healthy and flavorful. Exactly what I was looking for last night.

Method:

1) Begin by boiling a large pot of water for your pasta. Salt water and cook pasta for desired time.

2) In a separate skillet, saute garlic and red pepper in olive oil for a few minutes until it starts to golden.

3) Add sliced zucchini and season with salt and pepper. Saute for another few minutes until the zucchini begin to color. The thinner they are, the faster it will cook.

4) When the pasta is done cooking, reserve about a ½c of pasta water (if need for a thinner consistency). Drain pasta and add directly to the skillet as well as the mascapone+lemon zest and fresh Parmesan. Turn heat off and toss to combine.

Print Recipe
5 from 4 votes

Zucchini with Creamy Penne

Servings: 2 servings
Calories: 668kcal
Author: Samantha Ferraro

Ingredients

  • ½ lb whole wheat penne
  • ½ c mascapone + 1 teaspoon lemon zest mixed together
  • 2 small or 1 large zucchini sliced very thin I used a mandolin at #3 setting
  • 1-2 garlic cloves chopped
  • 1 teaspoon red pepper flakes
  • Freshly grated Parmesan
  • Olive oil for drizzling
  • Salt and pepper to taste
US Customary - Metric

Instructions

  • Begin by boiling a large pot of water for your pasta. Salt water and cook pasta for desired time.
  • In a separate skillet, saute garlic and red pepper in olive oil for a few minutes until it starts to golden.
  • Add sliced zucchini and season with salt and pepper. Saute for another few minutes until the zucchini begin to color. The thinner they are, the faster it will cook.
  • When the pasta is done cooking, reserve about a ½c of pasta water (if need for a thinner consistency). Drain pasta and add directly to the skillet as well as the mascapone+lemon zest and fresh Parmesan. Turn heat off and toss to combine.

Nutrition

Calories: 668kcal | Carbohydrates: 78g | Protein: 20g | Fat: 29g | Saturated Fat: 16g | Polyunsaturated Fat: 0.2g | Monounsaturated Fat: 0.02g | Cholesterol: 56mg | Sodium: 47mg | Potassium: 523mg | Fiber: 10g | Sugar: 7g | Vitamin A: 1257IU | Vitamin C: 39mg | Calcium: 113mg | Iron: 1mg

The Ultimate Paella

Jun 21, 2012 · 10 Comments

The flavors of this Ultimate Paella are layered and all came together perfectly. A pinch of saffron goes a long way and perfumed the entire dish-like magic. This is no cheap meal, by any means, so indulge on good product.

We used a 13 inch paella pan, and with some research, it does matter how much rice: liquid ratio and other ingredient amounts you chose to put in, according to your pan size.

We used shrimp, mussels, clams and lobster for seafood. When you put them in at the right time, the natural flavors of the shellfish melt through the rice and broth. Then you get that bite of spicy authentic chorizo, which you can't go wrong with in any way. Top with sweet peas and fresh squeeze of lemon. Are you drooling yet?

Just a reminder to save all of your discarded seafood shells for my Simple Homemade Seafood Stock.

How to clean clams/mussels before cooking

Now before we get into the steaming, let's talk about how to properly clean clams and mussels first. Honestly, it takes longer to clean clams then to cook them, but worth it so you don't bite into a hard piece of sand.

  • Once you bring home the shellfish, place them on ice and leave in the fridge until you're ready to cook them later (usually on the same day).
  • If you haven't worked with mussels before, it's pretty easy. Each mussel comes with a little "beard". Pull that out (it may be a bit hard at first).
  • 30 minutes before you're ready to cook, place the clams and clams in a large bowl of cold tap water. This help shellfish spit out any sand that may be inside.
  • Right when you're ready to cook, use a clam brush or something similar and scrub the outside of each clam and mussel. Then, you're ready to cook!

Method:

1) Begin by marinating the chicken in paprika, oregano, salt and pepper. Refrigerate for about an hour.

2) Heat oil in a paella pan over medium-high heat. Saute the chorizo until browned. Once cooked through, reserve to a plate.

3) Add chicken skin-side down and brown on all sides, turning with tongs. You don't need to cook chicken all the way through since it will cook through again in paella. Just brown well. Once browned, remove and reserve to a plate.

4) In the same pan, make a sofrito by sauteing the onions, garlic, and parsley. Cook for 2 or 3 minutes on a medium heat until onions begin to caramelize.

5) Then, add tomatoes and cook until the mixture caramelizes a bit and the flavors come together, about 10 minutes.

6) Next, add the rice to the tomato mixture and stir well allowing all the rice to be coated.

7) Pour in stock and simmer for 10 minutes. Stir gently at first, the the rice and liquid cook evenly.

8) Add chicken, chorizo, and saffron to rice mixture. Allow to simmer for about 5 minutes.

9) Add the clams, shrimp and lobster tails, tucking them into the rice. Allow everything to simmer together for about 15-20 minutes. We decided to lightly cover the pan with foil to allow everything to cook evenly. Then remove the foil and cook for another 10 minutes so the crusty socarrat can form.

As you can see, we may have overdone it with the sea food (but is that really a bad thing?) After I took the pic, we fixed the fish and tucked them more into the rice. Next time, less seafood and/or smaller chicken pieces.

10) Once done, garnish with peas, parsley and lemon wedges.

More great seafood recipes

  • Cioppino (Italian Seafood and Tomato Stew)
    Cioppino (Seafood and Tomato Stew)
  • Baked Clams Casino
  • Steamed clams in white wine with garlic.
    Steamed Clams with White Wine and Garlic
  • Coconut curry mussels in a creamy coconut broth with fresh lime as garnish.
    Thai Coconut Curry Mussels
Print Recipe
5 from 12 votes

The Ultimate Paella

The ultimate paella full of chorizo, chicken and loads of clams, mussels and shrimp and all seasoned with floral saffron.
Prep Time15 minutes mins
Cook Time45 minutes mins
Total Time1 hour hr
Course: Dinner, Main
Cuisine: Spanish
Keyword: chicken and seafood paella, spanish paella recipe
Servings: 6 servings
Calories: 310kcal
Author: Samantha Ferraro

Ingredients

  • 2-3 pieces of chicken bone in, skin on (thigh and/or leg)
  • 1 chorizo sausages thickly sliced
  • ½ onion chopped
  • 2-3 garlic cloves chopped
  • 1 15-ounce can whole tomatoes, drained and hand-crushed
  • 1 ½ cups short grain Spanish rice
  • 3 cups chicken stock
  • Generous pinch saffron threads
  • 6 dozen littleneck clams cleaned
  • 6 mussels cleaned
  • ½ pound jumbo shrimp peeled and de-veined
  • 1 lobster tails cut in half
  • ½ cup sweet peas frozen and thawed
  • Lemon wedges for serving
  • Fresh parsley chopped (for garnish)
  • Olive oil for drizzling
  • Salt and pepper to taste

Spice Rub for Chicken

  • 1 teaspoon paprika
  • 1 teaspoon oregano
  • Salt and pepper
US Customary - Metric

Instructions

  • Begin by marinating the chicken in paprika, oregano, salt and pepper. Refrigerate for about an hour.
  • Heat oil in a paella pan over medium-high heat. Saute the chorizo until browned. Once cooked through, reserve to a plate.
  • Add chicken skin-side down and brown on all sides, turning with tongs. You don't need to cook chicken all the way through since it will cook through again in paella. Just brown well. Once browned, remove and reserve to a plate.
  • In the same pan, make a sofrito by sauteing the onions, garlic, and parsley. Cook for 2 or 3 minutes on a medium heat until onions begin to caramelize.
  • Then, add tomatoes and cook until the mixture caramelizes a bit and the flavors come together, about 10 minutes.
  • Next, add the rice to the tomato mixture and stir well allowing all the rice to be coated.
  • Pour in stock and simmer for 10 minutes. Stir gently at first, the the rice and liquid cook evenly.
  • Add chicken, chorizo, and saffron to rice mixture. Allow to simmer for about 5 minutes.
  • Add the clams, shrimp and lobster tails, tucking them into the rice. Allow everything to simmer together for about 15-20 minutes. We decided to lightly cover the pan with foil to allow everything to cook evenly. Then remove the foil and cook for another 10 minutes so the crusty socarrat can form.
  • Once done, garnish with peas, parsley and lemon wedges.

Nutrition

Calories: 310kcal | Carbohydrates: 49g | Protein: 17g | Fat: 5g | Saturated Fat: 2g | Polyunsaturated Fat: 1g | Monounsaturated Fat: 1g | Trans Fat: 0.01g | Cholesterol: 79mg | Sodium: 555mg | Potassium: 414mg | Fiber: 3g | Sugar: 4g | Vitamin A: 422IU | Vitamin C: 11mg | Calcium: 72mg | Iron: 4mg

Roasted Cauliflower with Penne

Jun 18, 2012 · 1 Comment

Roasted Cauliflower with Penne

We have had some fun these hast few weeks. I think you remember me saying that this is going to be the summer...the summer of renewal and all things bright and positive..."The summer of George" haha! The last two weeks have had an amazing start of the sunny season. A trip to Santa Barbara for our 7 year anniversary and recently an impromptu family excursion to Palm Springs (not to brag...)

With all this bathing suit wearing, it has come to my attention how serious we (ahem...Joe and I) need to be with what we are putting in our bodies. Now don't get me wrong. I whole-heartedly believe in real ingredients. So along with those colorful and fresh picked fruits and vegetables I will be devouring at the farmers market, yes, I will be eating REAL butter and enjoying a REAL glass of matured red wine when I feel like it. I am NOT a fan of those crazy non-fat, rice-made, chemical heavy-168 ingredient, soy based whatever, just because it has no calories and no fat. Just..scary

I felt like I was making a life altering decision, as I stood in the pasta aisle deciding whether to switch from white pasta to whole wheat. I am standing there with one bag of whole wheat pasta in one hand and white pasta in the other. This decision took an entire 10 minutes.

I ultimately went against my gut and took the whole wheat and RAN out of the aisle as fast as I could. How sad am I? I can't even handle whole wheat pasta. I had to ponder if I could tackle the thought of a more al dente bite. This is pathetic.

Roasted Cauliflower with Penne

The pasta came out perfect. It was made for a family gathering the day we got back from Santa Barbara and I wanted to make something easy and healthy for a large group. The cauliflower was bought the saw day at the SB farmers market and became nutty from canalization and whole wheat penne offered a bite and texture. I think we will stick to whole wheat pasta for a little while if pasta will be as good as this one.

Print Recipe
5 from 2 votes

Roasted Cauliflower with Penne

Makes 8-10 servings
Author: Samantha Ferraro

Ingredients

  • 1 head of cauliflower cut into small florets
  • 3-4 garlic cloves chopped
  • 1 lb whole wheat penne
  • ½-3/4 cup freshly grated Parmesan
  • 3-4 slices of day old bread ends cut off, toasted
  • Olive oil for drizzling
  • 1 teaspoon red pepper flakes
  • Salt and pepper to taste
  • Fresh chopped parsley

Instructions

  • Begin by getting water boiling for pasta and cook whole wheat pasta according to directions.
  • In a food processor, coarsely chop toasted bread until it looks like bread crumbs, set aside.
  • On a baking sheet lined with foil, place cauliflower flowers atop and add half of your chopped garlic, salt, pepper and olive oil. Toss to coat. Roast in 400 degree oven for about 30 minutes until cauliflower begins to brown and caramelize.
  • In a separate skillet, saute the rest of the chopped garlic, red pepper flakes and breadcrumbs. Allow breadcrumbs to toast up.
  • When cauliflower and penne are done, add both to the breadcrumb mixture (You will need a large pot) and toss well to coat. Add freshly grated Parmesan and drizzle more olive oil if needed. Season with salt and pepper. Garnish with fresh parsley.
Roasted Cauliflower with Penne


Enjoy!

White Bean Ragout with Pancetta

May 31, 2012 · 4 Comments

White bean ragout has white beans that are simmered in a condensed tomato mixture until soft and creamy and topped with salty pancetta and Parmesan.

Softened white beans simmering in a condensed tomato mixture; topped with salty pancetta and an incredibly healthy shaving of fresh parmigiana-this was going to be my transmission meal.

How to Make White Bean Ragout

1) In a food processor, process the onion, garlic and bell peppers until everything is mixed and just pureed. Set aside.

2) Heat a skillet with about a Tb of olive oil and begin to brown the pancetta. Cook until crisp and reserve on a paper-lined plate.

3) In the same pan with the pancetta droppings, add a drizzle more olive oil and the vegetable puree mixture. Cover and cook on low-medium heat for about 15 minutes until the puree softens. Then add tomato paste and stir well. Cook covered for a few more minutes.

4) Add broth and bring to a boil while scraping any pan drippings. Allow to reduce.

5) Add beans, tomatoes and pancetta back to the pan. Cover and cook on medium heat for about 15-20 minutes until the beans and tomatoes have softened. Season with salt and pepper.

6) Meanwhile, grill ciabatta slices until toasted and rub with half garlic so it perfumes the toasted bread.

7) When beans are done, top garlic crostini with bean mixture and drizzle with olive oil and a shaving of Parmesan.

Print Recipe
5 from 7 votes

White Bean Ragout with Pancetta

White bean ragout has white beans that are simmered in a condensed tomato mixture until soft and creamy and topped with salty pancetta and Parmesan.
Prep Time10 minutes mins
Cook Time35 minutes mins
Total Time45 minutes mins
Course: Lunch, Main
Cuisine: Italian
Servings: 4 servings
Calories: 270kcal
Author: Samantha Ferraro

Ingredients

  • 1 onion chopped
  • 1 red bell pepper chopped (I used leftover baby bell peppers)
  • 1-2 garlic cloves chopped + 1 extra cut in half
  • 2 teaspoons tomato paste
  • 8 ounces pancetta
  • Several thick slices grilled or toasted ciabatta
  • 2 15 ouce cans cannellini white kidney beans, rinsed and drained
  • 1-2 cups chicken or vegetable broth
  • 1 cup cherry tomatoes halved
  • Freshly grated Parmesan
  • Flat-leaf parsley chopped
  • Olive oil for drizzling
  • Salt and pepper to taste
US Customary - Metric

Instructions

  • In a food processor, process the onion, garlic and bell peppers until everything is mixed and just pureed. Set aside.
  • Heat a skillet with about a Tb of olive oil and begin to brown the pancetta. Cook until crisp and reserve on a paper-lined plate.
  • In the same pan with the pancetta droppings, add a drizzle more olive oil and the vegetable puree mixture. Cover and cook on low-medium heat for about 15 minutes until the puree softens. Then add tomato paste and stir well. Cook covered for a few more minutes.
  • Add broth and bring to a boil while scraping any pan drippings. Allow to reduce.
  • Add beans, tomatoes and pancetta back to the pan. Cover and cook on medium heat for about 15-20 minutes until the beans and tomatoes have softened. Season with salt and pepper.
  • Meanwhile, grill ciabatta slices until toasted and rub with half garlic so it perfumes the toasted bread.

Notes

Recipe inspired from Bon Appetit

Nutrition

Calories: 270kcal | Carbohydrates: 8g | Protein: 9g | Fat: 23g | Saturated Fat: 8g | Polyunsaturated Fat: 4g | Monounsaturated Fat: 10g | Trans Fat: 0.1g | Cholesterol: 37mg | Sodium: 406mg | Potassium: 332mg | Fiber: 2g | Sugar: 4g | Vitamin A: 1181IU | Vitamin C: 49mg | Calcium: 18mg | Iron: 1mg

Enjoy!

Lavender Vanilla Panna Cotta with Got Milk?

May 27, 2012 · 11 Comments

Creamy lavender panna cotta is infused with dried lavender and vanilla bean, creating a flavorful and aromatic desert.

1) In a saucepan over medium heat,  bring the vanilla bean, lavender, sugar, ½ cup milk and 1 ½ cups of heavy cream to a simmer. Cover, remove from heat and set aside to steep for 30 minutes.

2) In a separate bowl, mix the gelatin powder in with remaining ½ cup milk to hydrate.

3) Reheat vanilla mixture and pour over gelatin mixture. Whisk everything together until combined and the gelatin is dissolved. Then whisk in the crème fraiche and strain the mixture. Cool to room temperature.

4)  Now, with an electric mixer, whisk  the remaining 1 ½ cups of heavy cream to soft peaks. I have to be honest with you. I messed up the first time when I found out I got an A in my stats class and was jumping up and down from excitement that I left the mixer on! Ha! So keep a close watch. It can go from soft peaks to cottage cheese in seconds!

5) Next, gently fold in vanilla bean mixture in two parts.

6) Pour the milk mixture into ramekins (or cups) and chill for at least 6 hours or overnight.

7) Now onto the glorious sweet berry caramel sauce!

In a saucepan over high heat, combine sugar and water. Boil until mixture is an amber color.

8) Add berry puree and butter.

9) Whisk until dissolved then strain.

10) Pour berry sauce over panna cotta (that's already solidified) and top with fresh berries.

More great desserts:

  • Blueberry Lavender Peach Cobbler
  • Fruit Rose Tart with Rose Whipped Cream
  • Sweet blueberry borekas with sweet honey tahini glaze.
    Sweet Bourekas with Blueberries, Apples and Honey Tahini
  • Rose Saffron Ice Cream with Pistachios
Print Recipe
5 from 10 votes

Lavender Vanilla Panna Cotta with Got Milk?

Recipe curtesy of Got Milk? and Chef Danielle Keene
Prep Time10 minutes mins
Cook Time30 minutes mins
Chilling6 hours hrs
Total Time6 hours hrs 40 minutes mins
Course: Dessert
Cuisine: Italian
Servings: 6 servings
Calories: 707kcal
Author: Samantha Ferraro

Ingredients

Panna Cotta

  • 1 vanilla bean split
  • 2 ¼ tsp. dried lavender
  • ½ cup sugar
  • 1 cup milk
  • 3 cups heavy cream
  • ½ cup crème fraiche
  • 1 tbsp. powdered gelatin

Berry Caramel Sauce

  • 1 cup sugar
  • ¼ cup water
  • 1 ¾ cup fresh berries in season, pureed
  • 1 tbsp. butter
US Customary - Metric

Instructions

  • In a saucepan over medium heat, bring vanilla bean, lavender, sugar, ½ cup milk and 1 ½ cups of heavy cream to a simmer. Cover, remove from heat and set aside to steep for 30 minutes.
  • In a separate bowl, mix gelatin powder in remaining ½ cup milk to hydrate.
  • Reheat vanilla mixture and pour over gelatin mixture. Whisk until combined and gelatin is dissolved.
  • Whisk in crème fraiche and strain. Cool to room temperature.
  • With an electric mixer, whisk remaining 1 ½ cups of heavy cream to soft peaks.
  • Gently fold in vanilla bean mixture in two parts and pour mixture into small ramekins or cups and chill for 6 hours or overnight.

Berry Caramel Sauce

  • In a saucepan over high heat, combine sugar and water and boil until mixture is an amber color.
  • Add berry puree and butter and whisk until dissolved.
  • Strain puree and serve over panna cotta.

Nutrition

Calories: 707kcal | Carbohydrates: 63g | Protein: 8g | Fat: 50g | Saturated Fat: 31g | Polyunsaturated Fat: 2g | Monounsaturated Fat: 12g | Trans Fat: 0.1g | Cholesterol: 145mg | Sodium: 89mg | Potassium: 209mg | Fiber: 1g | Sugar: 60g | Vitamin A: 1906IU | Vitamin C: 5mg | Calcium: 138mg | Iron: 0.3mg


Kumquat-Orange Cardamom Bars {Guest Post}

May 17, 2012 · Leave a Comment

Summer is in the air today and I can hear the waves crashing just a few blocks away from me. It's a good life I have, I tell ya. Living in a small beach town where all the dogs know each other and I can walk 5 minutes and touch the sand with my bare toes.

I am planning on making this an every day occurrence this summer.

And with summer oh so close, amazing produce is coming into bloom and just begging to be eaten, which came to be the inspiration for these kumquat-orange cardamom bars which are also in perfect season.

So for today, I have the wonderful pleasure of guest posting and bringing these citrusy treats over to Erin at Lemon Sugar.

Erin is an AMAZZING baker and I already have her cheesy garlic biscuits on my to-do list ohhh and these lemon cupcakes! I just cant decide what to make first. But we all know how baking and I are; its a love-hate relationship.

Julia Child's Omelette Roulee

May 11, 2012 · 3 Comments

Julia Child's omelette roulee is a rolled omelette and is simply made with eggs, butter and scallions with a creamy center and pale exterior.

My Julia Child series has kicked off in just the right time. Just recently, the  owners of Julia Child's Facebook page contacted me and 99 other food bloggers nation wide to help recognize her 100th Birthday celebration on August 15. Until then, I will feature one of her recipes (as I am already doing) that was hand picked by master chefs, such as Thomas Keller.

I am so excited about this amazing event. If you would learn more find them on Julia Childs Facebook page.

This is the first week of the Julia Child celebration (@JC100), and omelette roulee is on the menu for today. A classic French style omelette that is all about technique and happens just as fast as you would crack eggs. I read the pages of the recipe over and over again to make sure I understood this perfectly. A proper French omelette is different than what we usually have at a local dinner. The omelette is barely colored and becomes buttery soft, while using only butter to coat the pan, of course.

Because I felt this was so techniqueley detailed, Joe and I teamed up together to make the perfect omelette roulee. He was the flipper, I was the photographer. The key is to use a wide pan so the eggs can come together and cook for a second. (We figured that out the hard way!) Next tip, if you step away, you've already cooked them too much...it happens that quickly!

As for the flavorings, 'aux fines herbes" (with herbs) seemed to do the trick on this spring morning. A healthy sprinkling of green onion and fresh parsley was just enough to flavor the delicate eggs. Honestly, this was probably the most delicious omelet I have ever had.

Method:

1) Begin by heating a 7 inch non-stick skillet with 1 Tb of butter on high heat. Swirl the pan so the butter coats all over and the sides. Allow the butter to melt and watch for the butter to foam but don't allow to brown.

2) Beat eggs in a bowl until the whites and yolks are just mixed. Add chopped herbs, salt and pepper and whisk one more time.

3) Just as the butter is foaming, pour the eggs into the pan and allow to set for about 3 seconds while swirling the pan so it doesn't stick or overcook.

4) Now here's the tricky part. Tilt the pan away from you slightly and begin jerking it towards you so that the eggs are folding over itself.

5) Then have your plate ready in another hand and tilt the omelet from the pan onto the plate.

Bon Appetit!

More Julia Child recipes:

  • Step by step instructions for Julia Child's Coq Au Vin, with stewed chicken in a rich buttery red wine sauce with sauteed mushrooms and pearl onions.
    Julia Child's Coq Au Vin Recipe
  • Julia Child's Boeuf Bourguignon
  • Julia Child's Salad Nicoise
  • Julia Child's Cheese Souffle
    Julia Child's Cheese Souffle
Print Recipe
5 from 8 votes

Julia Child's Omelette Roulee

Julia Child's omelette roulee is simply made with eggs, butter and scallions with a creamy center and pale exterior.
Prep Time10 minutes mins
Cook Time5 minutes mins
Total Time15 minutes mins
Course: Breakfast
Cuisine: French
Keyword: French omelette, Julia child omelette
Servings: 1 omelette
Calories: 234kcal
Author: Samantha Ferraro

Ingredients

  • 2-3 eggs
  • 1 Tb butter
  • 2-3 green onion or scallions chopped
  • Small bunch of fresh parsley chopped
  • Salt and pepper to taste
US Customary - Metric

Instructions

  • Begin by heating a 7 inch non-stick skillet with 1 Tbl of butter on high heat. Swirl the pan so the butter coats all over and the sides. Allow the butter to melt and watch for the butter to foam but don't allow to brown.
  • Beat eggs in a bowl until the whites and yolks are just mixed. Add chopped herbs, salt and pepper and whisk one more time.
  • Just as the butter is foaming, pour the eggs into the pan and allow to set for about 3 seconds while swirling the pan so it doesn't stick or overcook.
  • Now here's the tricky part. Tilt the pan away from you slightly and begin jerking it towards you so that the eggs are folding over itself.
  • Then have your plate ready in another hand and tilt the omelet from the pan onto the plate.

Notes

Excerpted from Mastering the Art of French Cooking by Julia Child. Copyright ©1961 by Alfred A. Knopf. Reprinted with permission from the publisher Alfred A.Knopf, a division of Random House, Inc.

Nutrition

Calories: 234kcal | Carbohydrates: 2g | Protein: 12g | Fat: 20g | Saturated Fat: 10g | Polyunsaturated Fat: 2g | Monounsaturated Fat: 6g | Trans Fat: 0.5g | Cholesterol: 357mg | Sodium: 219mg | Potassium: 191mg | Fiber: 1g | Sugar: 1g | Vitamin A: 1064IU | Vitamin C: 5mg | Calcium: 70mg | Iron: 2mg

Julia Child's Chicken with Herbes de Provence

Apr 27, 2012 · 6 Comments

 
The Julia series continues this week with Poulet Saute aux Herbes de Provence, which is sauteed chicken with provencal herbes in a garlicky cream sauce.
 
When I took the first bite of this dish, I quickly blurted out "this is the best chicken I have ever made". And I still believe that to be true. The flavors are unlike anything I have combined before.
 
The chicken is sauteed in butter and olive oil, because..why not? Whole cloves of garlic perfume the casserole and then are roughly smashed, breaking up it's aroma and flavors even more. The herbes introduced are bright yet earthy. A simple sauce is then whisked together to form the most palatable bite you will ever come across-a simple hollondaise, if you will-combining the flavors of the crushed garlic and herbes. Serve with simple potatoes and roasted vegetables and allow the egg-suace to pour over. This is the best sauce you will ever make.
 
 
Method:
 
1) In a medium casserole pot, heat the butter and olive oil on medium heat until lightly foaming.


2) Add the chicken and cook until lightly brown on both sides, about 5 minutes.
Add salt and pepper, herbes de provence and garlic.


3) Cover pot and allow chicken to cook for about 10-12 more minutes or more if using bone-in. You want the chicken to be cooked through with clear juices running if pricked with a fork.
As the chicken cooks, baste the chicken with its butter several times.


4) When chicken is done, remove to a plate and keep warm.
Mash the garlic in the casserole with the back of a spoon.
 
 
5) Add the ½c of white wine and reduce it by about half over high heat while scraping the bottom of the pot.
(This is the best part!)


6) In another small pot, beat the egg yolks until they are thick and sticky over medium heat. Beat in lemon juice and 1Tb of white wine.


7) Next, beat in the casserole liquid very slowly, a few tablespoons at a time. This will create a thick and gorgeous hollondaise sauce.


8) Continue to beat the sauce over low heat until it is thick and creamy.
 
9) Plate the reserved chicken and pour the hollondaise over. Top with freshly chopped parsely and/or basil.


Bon Appetit


Print Recipe
4.82 from 11 votes

Julia’s Chicken with Herbes de Provence

A classic Julia Child recipe with sauteed chicken in herbes de provence and simple hollondaise sauce.
Prep Time10 minutes mins
Cook Time30 minutes mins
Total Time40 minutes mins
Course: Dinner, Main
Cuisine: French
Keyword: chicken with herbs de provence
Servings: 4 servings
Calories: 320kcal
Author: Samantha Ferraro

Ingredients

  • 5-6 chicken legs and thighs bone in or out
  • ½ stick of butter
  • 2 teaspoon herbes de provence
  • 3-4 cloves of garlic left whole
  • ½ c white wine + 1Tb
  • 2 egg yolks
  • 1 lemon juiced
  • Salt and pepper to taste
  • Fresh parsley or basil roughly chopped (for garnish)
US Customary - Metric

Instructions

  • In a medium casserole pot, heat the butter and olive oil on medium heat until lightly foaming.
  • Add the chicken and cook until lightly brown on both sides, about 5 minutes.
  • Add salt and pepper, herbes de provence and garlic.
  • Cover pot and allow chicken to cook for about 10-12 more minutes or more if using bone-in. You want the chicken to be cooked through with clear juices running if pricked with a fork. As the chicken cooks, baste the chicken with its butter several times.
  • When chicken is done, remove to a plate and keep warm.
  • Mash the garlic in the casserole with the back of a spoon.
  • Add the ½c of white wine and reduce it by about half over high heat while scraping the bottom of the pot.
  • In another small pot, beat the egg yolks until they are thick and sticky over medium heat. Beat in lemon juice and 1Tb of white wine.
  • Next, beat in the casserole liquid very slowly, a few tablespoons at a time. This will create a thick and gorgeous hollondaise sauce.
  • Continue to beat the sauce over low heat until it is thick and creamy.
  • Plate the reserved chicken and pour the hollondaise over. Top with freshly chopped parsely and/or basil.

Nutrition

Calories: 320kcal | Carbohydrates: 5g | Protein: 47g | Fat: 9g | Saturated Fat: 3g | Polyunsaturated Fat: 2g | Monounsaturated Fat: 3g | Trans Fat: 0.01g | Cholesterol: 246mg | Sodium: 171mg | Potassium: 568mg | Fiber: 1g | Sugar: 1g | Vitamin A: 269IU | Vitamin C: 20mg | Calcium: 60mg | Iron: 3mg
 
Looking for more French recipes? Try my updated version of Julia Child's coq au vin with a glass of Chianti and some good crusty bread.


Julia Child's Cheese Souffle

Apr 20, 2012 · 27 Comments

Julia Child's Cheese Souffle

A step by step guide to making a show stopping Julia Child cheese souffle, with Gruyere and Parmigiano and a touch of spice.

 
Julia Child's Cheese Souffle
 

Welcome to my first installment into the new Little Ferraro Kitchen series, featuring the Queen of the Kitchen, Julia Child. I will be making and blogging 1 recipe of hers per week, preferably on Fridays (so you can cook it over the weekend) with detailed step by step photos and cooking explanations.

As you can see, I have been channeling Julia recently and ever since I received her cookbook Mastering the Art of French Cooking, I have been a tad obsessed.


Mastering the Art of French Cooking is just as the title dictates. Julia not only offers detailed explanations of the recipe steps, but deeply illustrates the importance cooking techniques, what equipment to use and how and what to look for when buying ingredients. Honestly, this is the cooking Bible!

 
Julia Child's Cheese Souffle
 

As I was making this cheese souffle, I was imagining how Julia was doing it. I put on my apron and thought of her high-pitched, yet intoxicating voice. I carefully beat my eggs to a perfect "white sheen" as she spoke of and made sure to not over beat them. This was the intimidating part, the egg whites. However, Julia did not disappoint and I was met with the perfect white sheen that she specifically illustrated.


Called "Souffle Au Fromage" in French is a glorious combination of a simple thickened white sauce paired with a flavorful cheese. Stiffened egg whites are carefully folded in and when this masterpiece is concluded, the most beautiful creation will equate from your oven. A light, puffy burst of salty flavored cheese souffle. The inside of this Souffle Ramekin is delicate and warm and the bottom and sides have crusted together forming a heavenly thick cheese layer.


Serves 4 for a 6 cup souffle mold

 
Method:
 

1) Start by buttering the mold and sprinkling with cheese. I chose to use Parmesan cheese because it grated finer than Gruyere. Preheat oven to 400 degrees.

 
Julia Child's Cheese Souffle
 

2) I watched her You Tube video relentlessly and made sure I illustrated the foil-wrap well. This will make sure that your souffle will not spill over and will keep a high mold.

Tear a long enough piece of foil so that it is long enough to wrap around your mold.

 Fold in half lengthwise and butter one side. The buttered side will be the "inside" of the mold.

 
Julia Child's Cheese Souffle
 

 3) Wrap the foil around the mold. If your mold has little handles like mine does, cut small slits so the foil can fit. Secure lose top ends with paper clips.

 
Julia Child's Cheese Souffle
 

4) Melt the 3Tb of butter in a sauce pan and stir in the flour with a spatula, cooking over medium heat until the butter and flour foam together for about 2 minutes without browning.


Julia Child's Cheese Souffle


5) Remove from heat. When mixture has stopped bubbling, pour in all of the boiling milk at once and beat vigorously with a whisk until well blended.

 
Julia Child's Cheese Souffle


6) Beat in the seasonings, cayenne or paprika, nutmeg and salt and pepper. Return to moderate heat and continue to stir with a whisk for another minute. The mixture will be very thick.

 
Julia Child's Cheese Souffle


7) Remove from heat, take the egg yolks and beat 1 egg yolk into your white cream mixture one at a time until well incorporated.

 
Julia Child's Cheese Souffle


Ah now for the egg whites! This is VERY important..so listen up!

 
8) In a clean, dry mixing bowl, begin to beat your egg whites with a whisk attachment on low speed. You will see that the egg whites will "break up" and begin to have a foamy consistency.

8) In a clean, dry mixing bowl, begin to beat your egg whites with a whisk attachment on low speed. You will see that the egg whites will "break up" and begin to have a foamy consistency.

 
Julia Child's Cheese Souffle


Do not leave your egg whites! Continue checking them. What you want to see are "traces" on the surface. The egg whites should also have a glossy white sheen and be able to be stiff and firm when holding with a whisk.


9) As the egg whites are foaming, increase the speed gradually and add cream of tartar and a pinch of salt. Increase the speed to fast and continue to beat for a few more minutes.

 
Julia Child's Cheese Souffle


10) Once the egg whites are done, don't let them sit for long. Take a large spoonful and stir it into the cream mixture to lighten it.

 
Julia Child's Cheese Souffle


11) Stir in all but about 1 Tbl of the grated cheese into the cream mixture.

 
Julia Child's Cheese Souffle


12) There is a technique with folding the rest of the egg whites. Take one large spoonful of the egg whites and using your spatula, cut down the middle and draw the spatula under, while scraping the side of the pan and turning the pan with the other hand. Basically, you folding under and to the side.


Continue with the rest of the egg whites. Be careful not to over fold. It's OK if there are white streaks leftover.

 
Julia Child's Cheese Souffle


13) Now your mixture is ready! Carefully pour your mixture into the prepared mold. It should be about ¾ high. Tap the mild carefully to even it out and top with remaining Tb of cheese.

 
Julia Child's Cheese Souffle


14) Place the cheese souffle on middle-back rack of  pre-heated 400 degree oven.Once in, immediately turn down to 375 degrees.

Bake for exactly 30 minutes and DO NOT, I repeat, DO NOT open the oven door ever during that 30 minutes!


15) The cheese souffle will have puffed up a few inches over the mold and will be a gorgeous golden brown on top. Insert a tester, if it comes out clean, it's done.


Julia Child's Cheese Souffle
 

16) To serve: Use 2 spoons and lightly puncture the top of the souffle. Don't scoop from the bottom, that will deflate it, just spoon vertically.


Julia Child's Cheese Souffle


Bon Appetit!
 
Julia Child's Cheese Souffle
Print Recipe
4.85 from 46 votes

Julia Child’s Cheese Souffle

A step by step guide to making a show stopping Julia Child cheese souffle, with Gruyere and Parmigiano and a touch of spice.
Prep Time20 minutes mins
Cook Time30 minutes mins
Total Time50 minutes mins
Course: Main Course
Cuisine: French
Keyword: cheese souffle, Julia Child souffle
Servings: 4 servings
Calories: 379kcal
Author: Samantha Ferraro

Ingredients

  • 4 Tb of butter 1Tb for buttering mold
  • 1 Tb grated Parmesan cheese for dusting mold
  • 3 Tb flour
  • 1 c milk lightly boiling
  • 4 egg yolks
  • 5 egg whites
  • 1 c grated Gruyere cheese
  • ½ teaspoon paprika
  • Salt and pepper to taste
  • Pinch of nutmeg
  • ¼ teaspoon cream of tartar for the egg whites
US Customary - Metric

Instructions

  • Start by buttering the mold and sprinkling with cheese. I chose to use Parmesan cheese because it grated finer than Gruyere. Preheat oven to 400 degrees.
  • The foil wrap: This will make sure that your souffle will not spill over and will keep a high mold.
  • Tear a long enough piece of foil so that it is long enough to wrap around your mold. Fold in half length-wise and butter one side. The buttered side will be the "inside" of the mold. Wrap the foil around the mold. If your mold has little handles like mine does, cut small slits so the foil can fit. Secure lose top ends with paper clips.
  • Melt the 3Tb of butter in a sauce pan and stir in the flour with a spatula, cooking over medium heat until the butter and flour foam together for about 2 minutes without browning.
  • Remove from heat. When mixture has stopped bubbling, pour in all of the boiling milk at once and beat vigorously with a whisk until well blended.
  • Beat in the paprika, nutmeg and salt and pepper. Return to moderate heat and continue to stir with a whisk for another minute. The mixture will be very thick.
  • Remove from heat, take the egg yolks and beat 1 egg yolk into your white cream mixture one at a time until well incorporated.
  • Now for the egg whites. In a clean, dry mixing bowl, begin to beat your egg whites with a whisk attachment on low speed. You will see that the egg whites will "break up" and begin to have a foamy consistency.
  • As the egg whites are foaming, increase the speed gradually and add cream of tartar and a pinch of salt. Increase the speed to fast and continue to beat for a few more minutes.
  • Do not leave your egg whites! Continue checking them. What you want to see are "traces" on the surface. The egg whites should also have a glossy white sheen and be able to be stiff and firm when holding with a whisk.
  • Once the egg whites are done, don't let them sit for long. Take a large spoonful and stir it into the cream mixture to lighten it.
  • Stir in all but about 1Tbl of the grated cheese into the cream mixture.
  • There is a technique with folding the rest of the egg whites. Take one large spoonful of the egg whites and using your spatula, cut down the middle and draw the spatula under, while scraping the side of the pan and turning the pan with the other hand. Basically, you folding under and to the side.
  • Continue with the rest of the egg whites. Be careful not to over fold. It's OK if there are white streaks leftover. Now your mixture is ready! Carefully pour your mixture into the prepared mold. It should be about ¾ high. Tap the mild carefully to even it out and top with remaining Tb of cheese.
  • Place on middle-back rack of pre-heated 400 degree oven.Once in, immediately turn down to 375 degrees.
  • Bake for exactly 30 minutes and DO NOT, I repeat, DO NOT open the oven door ever during that 30 minutes!
  • The souffle will have puffed up a few inches over the mold and will be a gorgeous golden brown on top. Insert a tester, if it comes out clean, it's done.
  • To serve: Use 2 spoons and lightly puncture the top of the souffle. Don't scoop from the bottom, that will deflate it, just spoon vertically.

Nutrition

Calories: 379kcal | Carbohydrates: 8g | Protein: 19g | Fat: 29g | Saturated Fat: 16g | Cholesterol: 269mg | Sodium: 328mg | Potassium: 218mg | Sugar: 3g | Vitamin A: 1120IU | Calcium: 446mg | Iron: 0.8mg


Green Pasta and Ham (Well...Pancetta)

Feb 15, 2012 · Leave a Comment

 
This is one of those days where simplicity and quick dinners turns into something deliciously surprising. I wasn't even planning on writing about this, but Joe did such a good job, I just had to snap some quick photos.
 
And I have to say, I'm not the only June Cleaver in this kitchen...nope...Joe can throw down some apron-handling, lemon juggling, pasta magic too. And after a long day and late classes, you want something good (and preferrably with carbs),quick, not too heavy and FULL of flavor.
 
Success.
 
So here is what Joey created.
 
Ingredients:
 
½ lb Spinach Pasta (or other)
8 oz Pancetta, chopped2ts
2 garlic cloves, chopped
Few stalks of swiss chard, roughly chopped
Small bunch of asparagus, cut in ½ or ⅓ on a diagnol
1 teaspoon red pepper flakes
½-1c freshly grated Parmigiano
Olive oil for drizzling
Salt and pepper, to taste
 
Method:
 
1) Start by boiling your water and cooking pasta. Reseve 1 cup of pasta water. 
 
2)In a large heated skillet, drizzle about 2tsp of olive oil in pan and cook pancetta until browned.
When done, remove pancetta and set on a seperate plate.
 
3) In same pan, add swiss chard, asparagus, red pepper flakes and salt and pepper.
*Joe likes both the leaves and stems. So strim just the ends of the stem off and chop the stem in small pieces.
*Add more oil if needed.
Cook vegetables for about 5 minutes until they are tender and bright green.
 
4) When vegetables are done, add pancetta back in the pan and lower the heat.
 
5) Grate about ½-1c of freshly grated Parmigiana cheese and add to pan.
 
5) When pasta is done, drain and add pasta directly to pan. Add about ¼ cup of starchy pasta water to pan and wix well. If you think its too dry, add more.
 
What I love about this dish is that everything happens in one pan..how easy is that? Asparagus and chard are earthy and snappy. The pancetta and parmigiana introduced a perfect salty bite. This will deffinitely be our go-to meal on long days.


Enjoy! 

A Bright and Cheerful Feast: Turmeric-Yogurt Marinated Chicken with Saffron Jasmine Rice

Jan 23, 2012 · 2 Comments

 
Spring is in the air when I made this dish...or in my mind at least. Not only are the colors insanely vibrant, but so are the flavors.
 
Essences of chili peppers and smoky turmeric meld with creamy yogurt to create an amazing marinade for your favorite main dish. Grilled Meyer lemons pumps up it's own juices and mellows out the fruits tartness. Squeeze the grilled juice over the chicken for the perfect bite.
 
And of course since I didn't feel yellow and cheery enough, I decided to make the perfect accompaniment - Saffron infused jasmine rice...Fancy, huh?
 
 
This was my first time working with both turmeric and saffron- and a successful first time too, thank goodness. The turmeric created a gorgeous deep yellow color that stained the chicken and looked magnificent grilled. The flavor was smokey and bright and paired perfectly with the cumin I added as well.
The saffron was a treat and something I found when I recently re-organized our kitchen cupboards. Score!
 
Turmeric and Yogurt Marinated Chicken: Adapted from here
 
Ingredients:
 
1 Serrano chile, with or without seeds chopped
1 Anaheim chile, with or without seeds, chopped
1-2 boneless, skinless chicken breast cut into 1in chunks
Bunch of parsley, chopped
½ c Plain, Greek yogurt (low-fat or NF) 
2 garlic cloves, coarsely chopped
1 teaspoon turmeric
1 teaspoon cumin
Salt and pepper to taste
Good drizzle of olive oil
Juice of 1 lemon
2 Meyer lemons, halved for grilling
 
 
Method:
 
1) Cut chicken in cube sized pieces that will fit in skewers. If using wood skewers, make sure to soak them before grilling so they don't burn.
 
2) In a small food processor or blender, add in all the marinading ingredients (except the chicken of course and the grilling lemons). Blend until it forms a very smooth consistency. If it's too thick, add a little more olive oil and/or lemon juice.
 
 
3) Pour yogurt marinate over chicken pieces and let sit for about 30 minutes. You can do this while you prepare the rice.
 
 
4) When ready, skewer the chicken and grill for about 5-8 minutes, or until chicken is done.
 
 
  5) Grill Meyer lemons reserving 1 for your plate and squeezing juice from another over chicken as it cooks.
 
Now for the Saffron Rice:
I have never worked with saffron before, so I wanted to make sure I was doing this correctly. Thankfully, Tori had a great tutorial and perfect Saffron rice recipe that was easy to do and follow. Plus it was Sephardic, perfect!
 
Saffron Infused Jasmine Rice: courtesy of The Shiksa
 
Ingredients:
 
1 c jasmine rice
2 c low-sodium chicken or vegetable broth
½ onion, chopped
2 good pinch of Saffron threads
Salt and pepper to taste
Olive oil for drizzling
 
Method:
 
1) Using a spice mortar, take a good pinch of saffron threads and grind them up until it breaks down and is a powdery consistency.
Then add another pinch of saffron, but don't crush.
Pour ¼ c of warm water over saffron and let steep for a few minutes.
 
 
2) In another pot, sautee your chopped onion in olive oil until it begins to carmelize.
 
 
3) Add jasmine rice to pot and satuee with onion for another minute.
 
 
4) Add saffron mixture and stir well, making sure everything is incorportated well. Season with salt and pepper.
(Sorry, forgot a pic of this step!)
 
5) Add chicken or vegetable stock and bring rice to a boil, then lower to a simmer until rice is done and no fluid is in pot. About 45 minutes.
 
6) When rice is done, fluff with a fork.
 
 
And finally...bring it all together.
 
Isn't this just gorgeous?!
 
 
Enjoy!
  • « Go to Previous Page
  • Page 1
  • Interim pages omitted …
  • Page 12
  • Page 13
  • Page 14
  • Page 15
  • Go to Next Page »

Primary Sidebar

Hi, I'm Samantha! I started this blog for my love of world cuisine and cultural flavors! You’ll find everything here from Jewish recipes, Middle Eastern, Italian and more!

More about me →

Fall Favorites

  • Julia Child's creamy potato leek soup with fresh thyme and olive oil on top.
    Julia Child's Creamy Potato Leek Soup
  • Pearled couscous with colorful roasted vegetables.
    Israeli Couscous Salad with Roasted Vegetables
  • Spanish inspired chicken stew with olives and potatoes.
    Spanish Chicken Stew
  • The perfect fall apple cake, seasoned with floral and earthy cardamom, bright orange zest and loaded with chunks of sweet apples. And perfect to serve alongside your favorite warm drink.
    Cardamom Apple Cake
  • Classic osso buco recipe served over creamy polenta and garnished with herb gremolata.
    Osso Buco with Gremolata
  • Easy French seafood stew with shrimp, mussels, clams and halibut.
    Simple Bouillabaisse Recipe (French Seafood Stew)
Buy This Book Online
Buy from Amazon Kindle
Buy from IndieBound
Buy from Barnes and Noble
Buy from Amazon
One Pot Mediterranean
Buy now!

Order My Latest Cookbook!

One Pot Mediterranean cookbook cover

Get my most Popular Seafood Recipes, the ones everyone asks for!

Thank you!

You have successfully joined our subscriber list.

Follow on Bloglovin

Footer

↑ back to top

Featured In

About

  • Privacy Policy
  • Accessibility Policy

Newsletter

  • Sign Up! for emails and updates

Contact

  • Contact

As an Amazon Associate I earn from qualifying purchases.

Copyright © 2025 · Samantha Ferraro · Little Ferraro Kitchen · All Rights Reserved

Rate This Recipe

Your vote:


A rating is required
A name is required
An email is required